OneClickVirt Basic Installation
OneClickVirt consists of a panel and controlled nodes. The panel only provides management and does not require a virtualization environment. Each controlled node must have its virtualization environment installed first.
Choose one installation page
Read either this page or Advanced Installation, then choose one method from that page's table. Do not run multiple installation methods for the same panel.
Controlled Node Preparation
A controlled node only needs its virtualization environment; no additional Agent is required. Use the corresponding platform installation script in this documentation, and make sure the panel can connect to the node over SSH.
WARNING
The host network interface must directly own every IP address that will be assigned or mapped. Hosts that receive a public IP only through VPC port mapping or NAT forwarding cannot be used as this type of managed node.
Panel Installation Methods
The panel needs at least 1 GB of free memory and 2 GB of free disk space. This table contains only the methods documented on this page, ordered from easiest to more involved.
| Difficulty | Method | Best for | Characteristics |
|---|---|---|---|
| Easy | Docker all-in-one image | Hosts with Docker that need the quickest deployment | Built-in database; run one image |
| Easy to moderate | One-click bare-metal installation | Clean Linux or BSD hosts that should install all dependencies automatically | Installs the database, reverse proxy, TLS, frontend, backend, and system service |
For 1Panel, separate frontend/backend deployment, external databases, precompiled binaries, or source builds, use Advanced Installation.
Method 1: Docker All-in-One Image
This method uses the all-in-one image with an embedded database. Install Docker on the host first; see Docker Main Installation if needed. Images support both linux/amd64 and linux/arm64.
Image registries:
TIP
The database starts together with the container. Wait at least 12 seconds after the first start before opening the page.
Without a Domain
docker run -d \
  --name oneclickvirt \
  -p 80:80 \
  -v oneclickvirt-data:/var/lib/mysql \
  -v oneclickvirt-storage:/app/storage \
  --restart unless-stopped \
oneclickvirt/oneclickvirt:latestOpen the following address after installation:
http://server-IPWith a Domain
Replace FRONTEND_URL with the actual public URL:
docker run -d \
  --name oneclickvirt \
  -p 80:80 \
  -e FRONTEND_URL="https://panel.example.com" \
  -v oneclickvirt-data:/var/lib/mysql \
  -v oneclickvirt-storage:/app/storage \
  --restart unless-stopped \
oneclickvirt/oneclickvirt:latestFRONTEND_URL affects CORS and OAuth2 callbacks, so it must match the URL users actually open.
Upgrade an Existing Container
Keep both data volumes and replace only the container and image:
docker rm -f oneclickvirt
docker pull oneclickvirt/oneclickvirt:latestThen run the same docker run command used for the current configuration. Do not delete oneclickvirt-data or oneclickvirt-storage, because they contain the database and application configuration.
View Status
docker ps --filter name=oneclickvirtView Logs
docker logs -f --tail 200 oneclickvirtUninstall
Remove only the container and image while retaining data for a future restore:
docker rm -f oneclickvirt
docker image rm oneclickvirt/oneclickvirt:latestOnly after confirming that the data is no longer needed, remove the volumes:
docker volume rm oneclickvirt-data oneclickvirt-storageWARNING
Removing the volumes permanently deletes the database and application configuration. Back them up first.
Method 2: One-Click Bare-Metal Installation
install_full.sh installs the database, reverse proxy, TLS, frontend, backend, and system service in one flow. It supports MySQL or MariaDB and Caddy, Nginx, or OpenResty.
The installer recognizes common Linux and Unix-like systems. BSD requires a matching OS and architecture release binary; otherwise, use Docker or a source build from Advanced Installation.
WARNING
The installer requires at least 10 GB of free disk space and 2 GB of combined memory and swap by default. Run it on a clean system when possible.
Download the Script
curl -fsSL https://raw.githubusercontent.com/oneclickvirt/oneclickvirt/main/scripts/install_full.sh -o install_full.shInteractive Installation
Run:
bash install_full.shDomain input accepts a protocol prefix: https://panel.example.com enables TLS, while http://panel.example.com disables it. Without a prefix, the installer asks whether to enable TLS.
Non-Interactive Installation
HTTPS with automatic TLS:
bash install_full.sh \
  --non-interactive \
  --domain https://panel.example.com \
  --email admin@example.com \
  --db-type mariadb \
--proxy caddyHTTP only:
bash install_full.sh \
  --non-interactive \
  --domain http://192.168.1.100 \
--proxy caddyThe final summary includes the access URL, database password, and initial administrator details. Save them before closing the terminal.
The unified lifecycle commands below apply to Linux installations that use systemd. Other service managers are listed by the installer; stop the service using that manager before replacing the matching release files for an upgrade.
Upgrade
Download the standard installer and run its upgrade command. It preserves the configuration file:
curl -fsSL https://raw.githubusercontent.com/oneclickvirt/oneclickvirt/main/scripts/install.sh -o install.sh
chmod +x install.sh
./install.sh upgradeView Status and Logs
./install.sh status
./install.sh logs --lines 200
./install.sh logs --followYou can also inspect logs directly through systemd:
journalctl -u oneclickvirt -fFor reverse-proxy troubleshooting, also view the service selected during installation:
journalctl -u caddy -f
# or
journalctl -u nginx -f
# or
journalctl -u openresty -fUninstall
The default removes the service, program, and web files while retaining config.yaml and storage:
./install.sh uninstallAfter confirming that application configuration and storage are no longer needed, run ./install.sh uninstall --purge. Non-interactive uninstall also requires --yes. The command does not remove the database, database account, reverse-proxy configuration, or TLS certificates because other services may share them.
Initialization
Both basic methods prepare the database automatically. You do not need to install MySQL separately or create an empty database.
- Docker all-in-one image: open the page for the first time and complete the administrator and other settings in the initialization form.
- One-click bare-metal installation: the script attempts automatic initialization. If it reports that automatic initialization failed, open the printed URL and complete the form manually.
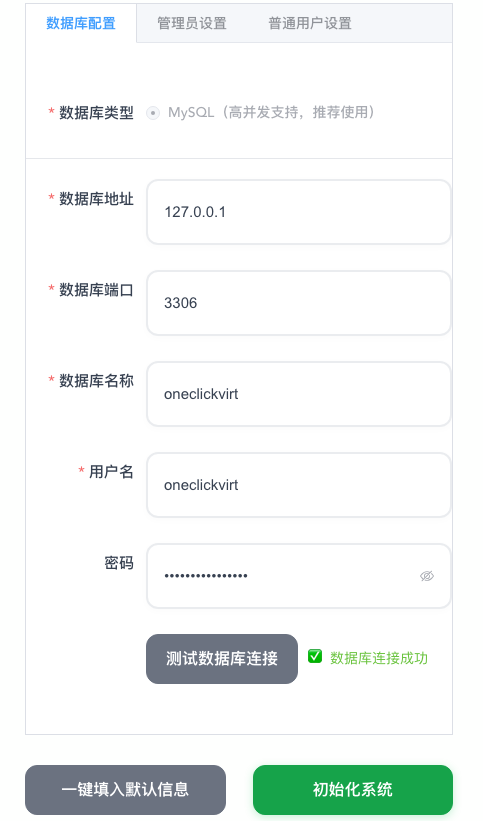
Manual initialization opens this page automatically:
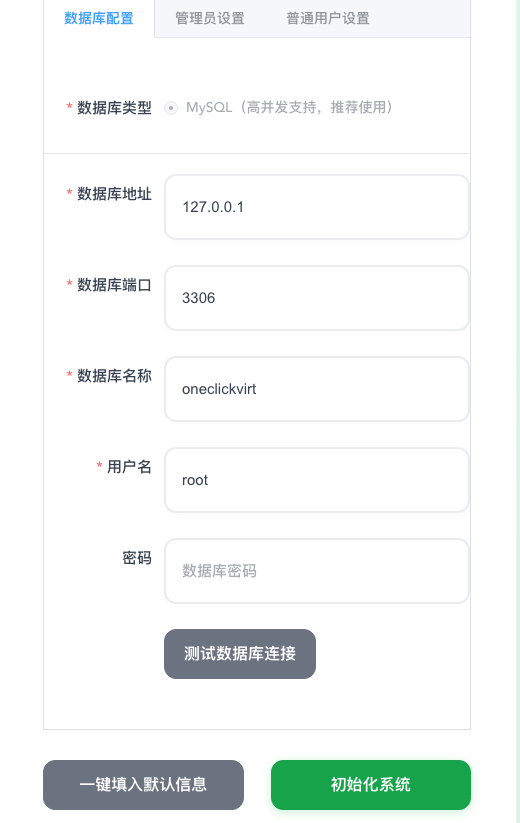
Make sure the database connection test passes, enter and save the administrator credentials, and initialize the system:
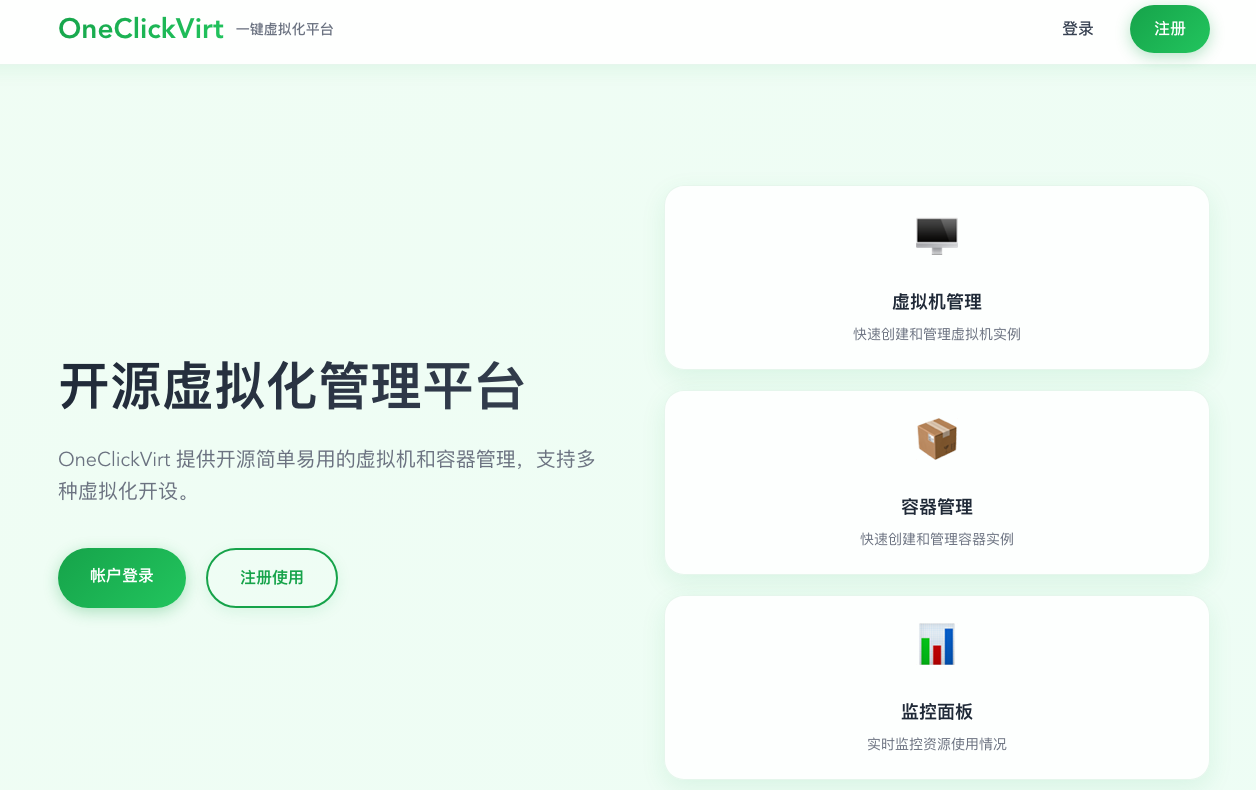
The application opens the home page when initialization completes:
Initial setup imports the system image seeds, but enables only Debian and Alpine images by default. Administrators can search by type, architecture, and version in system image management to enable additional images.
Windows, Android, macOS, and similar images remain disabled by default and have higher CPU, memory, disk, nested virtualization, or KVM/Docker runtime requirements. Confirm the target node meets those requirements before enabling them.
After initialization, make sure the administrator uses a strong password and disable or delete the default testuser account.