Setting Up Windows Visual Machine
Choose KVM virtualization or QEMU's TCG emulation at startup
The host itself, if it supports nested virtualization, can use host or kvm64 or qemu64 type CPUs
In terms of performance, host > kvm64 > qemu64
The qemu type of virtualization has a lot of performance loss
If you don't support nested virtualization, you can only use qemu64 type CPU, and you need to change KVM hardware virtualization in Options before you start the VM
Set it to no to uncheck Enabled[enabled].
If you're really not sure if your machine supports nested virtualization, then check System and Hardware Configuration Requirements --> Detecting the Environment Detecting to ensure it's available (with attempts to enable the feature)
The main logic for this is in the
https://raw.githubusercontent.com/oneclickvirt/pve/main/scripts/check_kernal.sh
It is recommended to use PVE's System and Hardware Requirements --> Environment Detection in this tutorial for one-click detection, or the following detection logic:
egrep -c '(vmx|svm)' /proc/cpuinfo if it is 1
cat /sys/module/kvm_intel/parameters/nested if it exists and is 1
lsmod | grep -q kvm if it is loaded.
If all of these are supported, choose the host type to be 100% problem-free, in other cases there may be unknown errors try it yourself.
Using ISO Image with VirtIO for VM Setup
1. Download the Image
Before installation, you need to download the image file via local(pve) --> ISO images --> Download from URL
For the download link (URL:), you can use files from: https://github.com/ILLKX/Windows-VirtIO
Enter win.iso as the File Name:
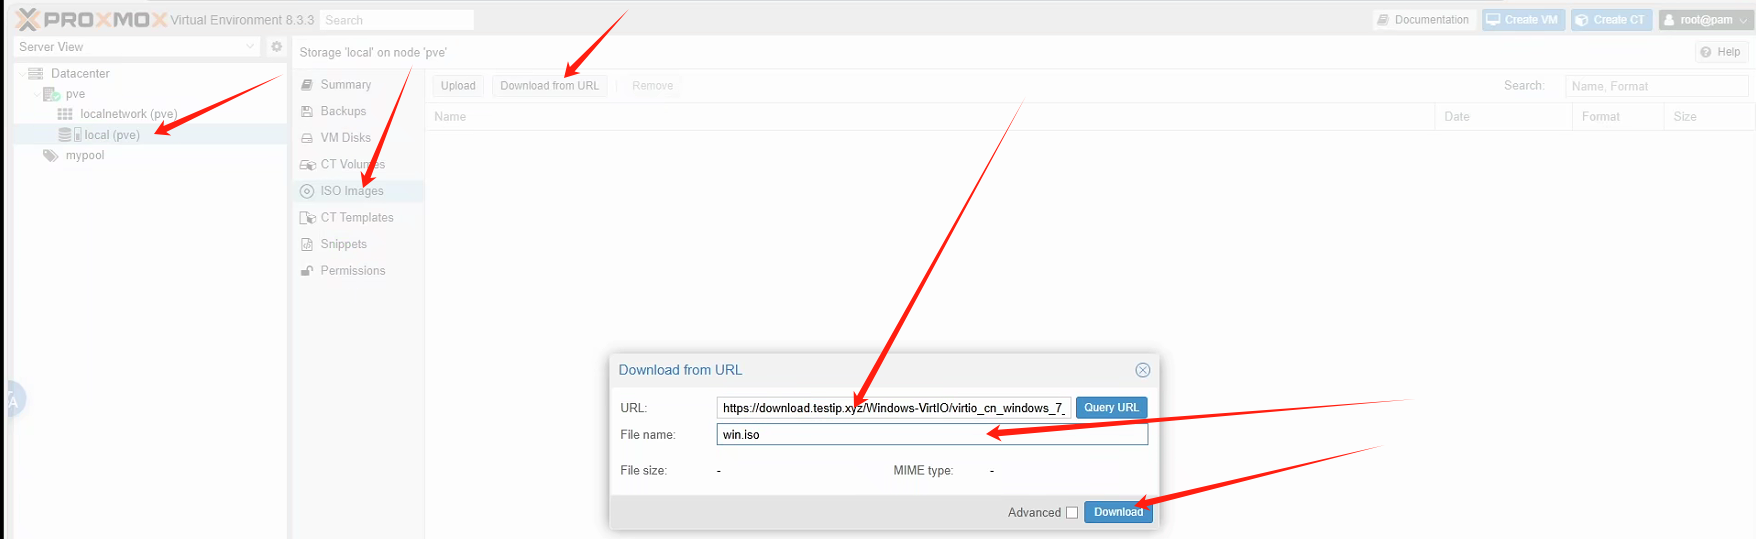
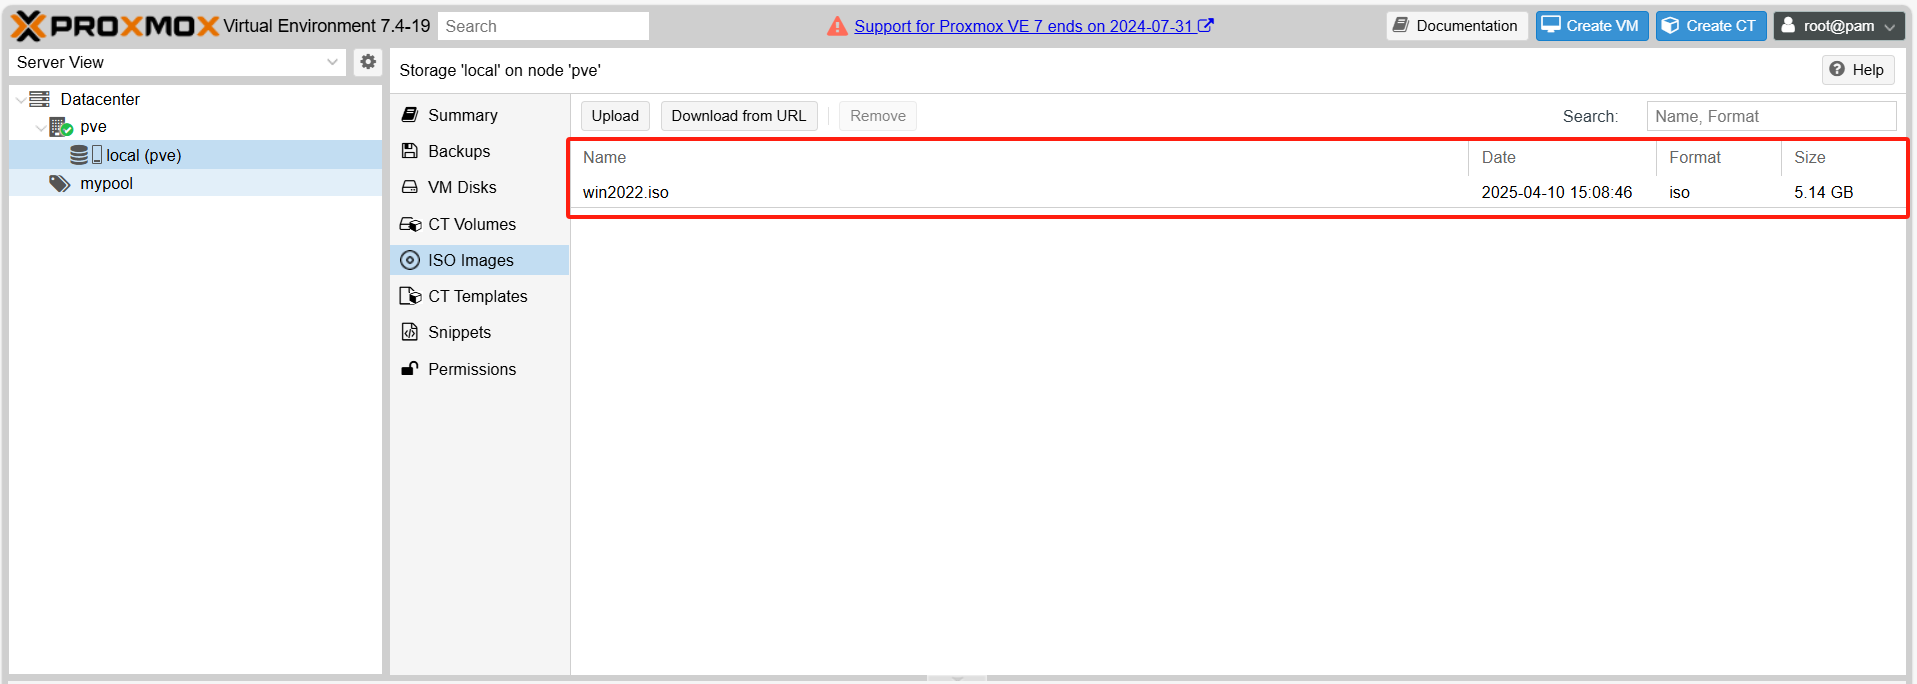
Click Download. After downloading is complete, you can see the file size of win.iso on the current page, confirming it's in ISO format.
2. Setting Up the Template
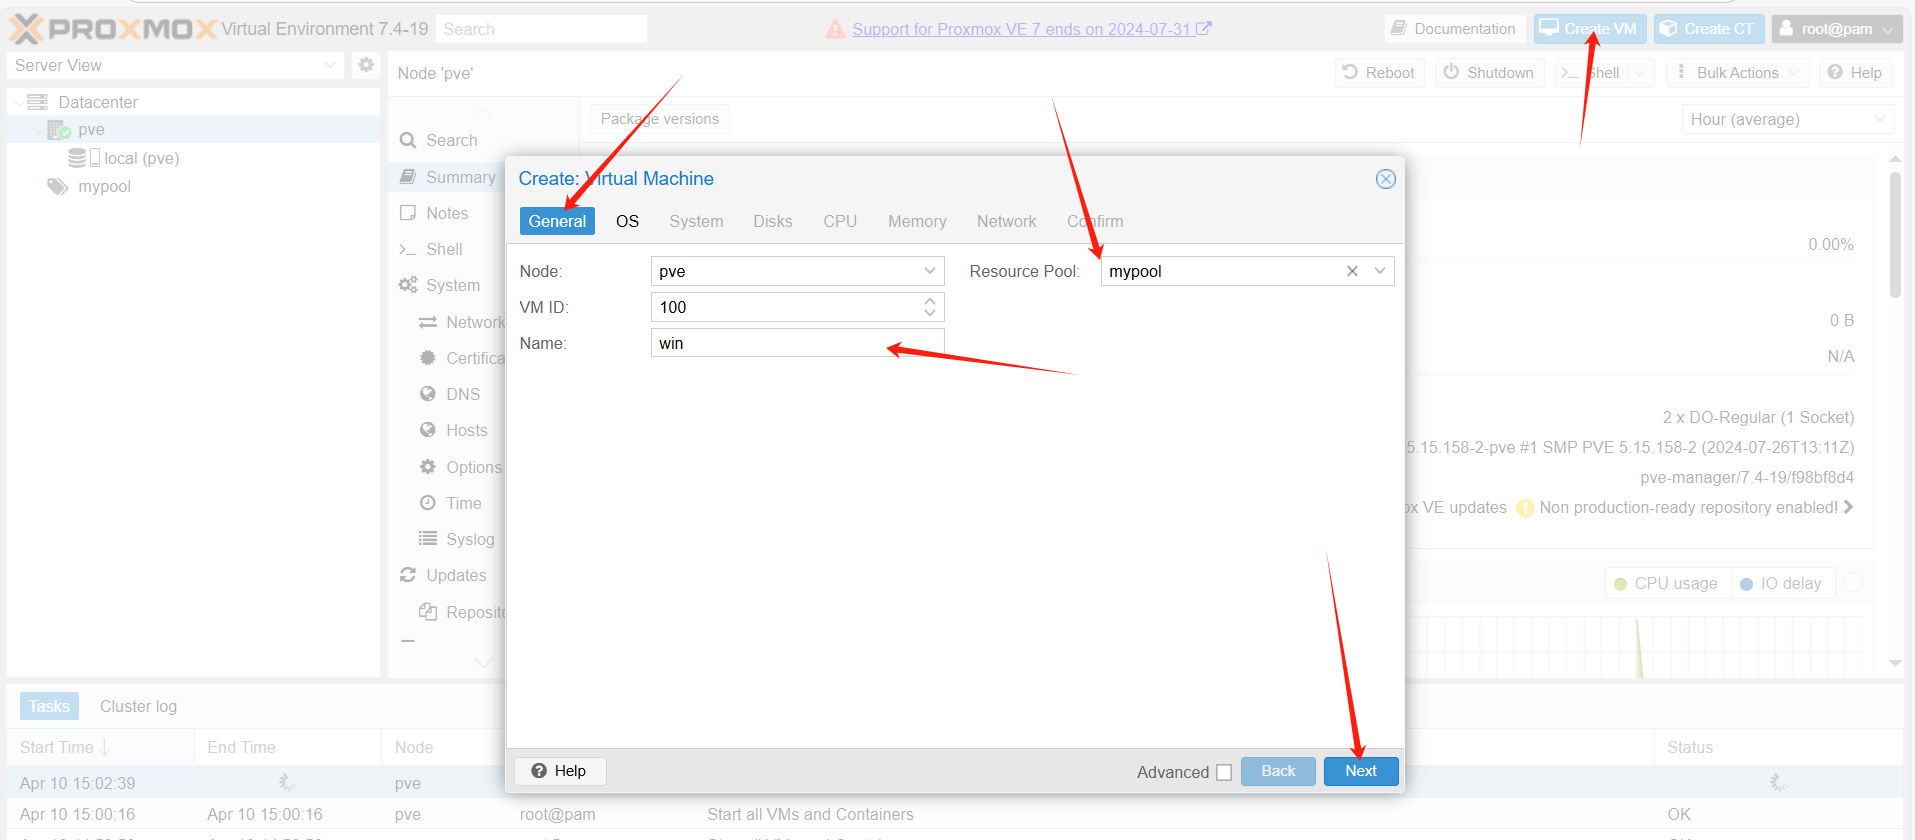
Click Create VM in the top right corner of the page.
In the General window, select mypool for Resource Pool:, enter win for Name, then click Next.
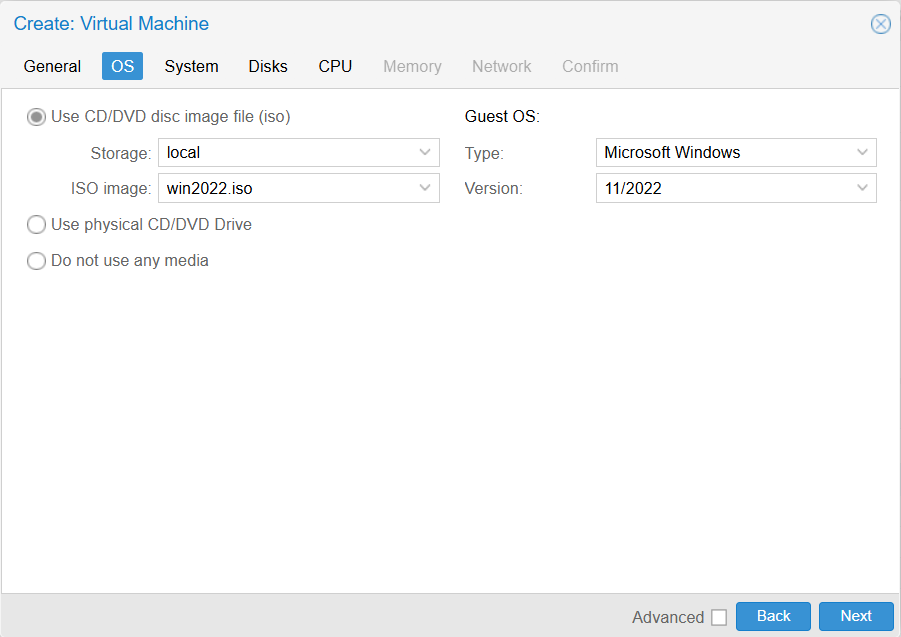
In the OS window, select win.iso for ISO image. For Guest OS, select Microsoft Windows as the Type and choose the appropriate Version for your ISO. For example, if you downloaded Windows 2022, select 11/2022, then click Next.
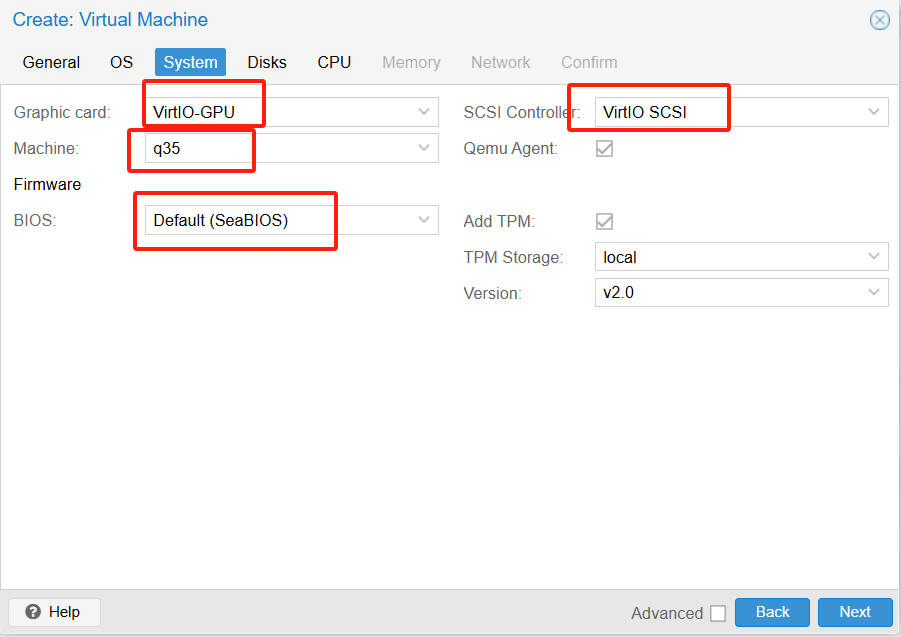
In the System window, select VirtIO-GPU for Graphic card, q35 for Machine, VirtIO SCSI for SCSI Controller, and Default (SeaBIOS) for BIOS, then click Next.
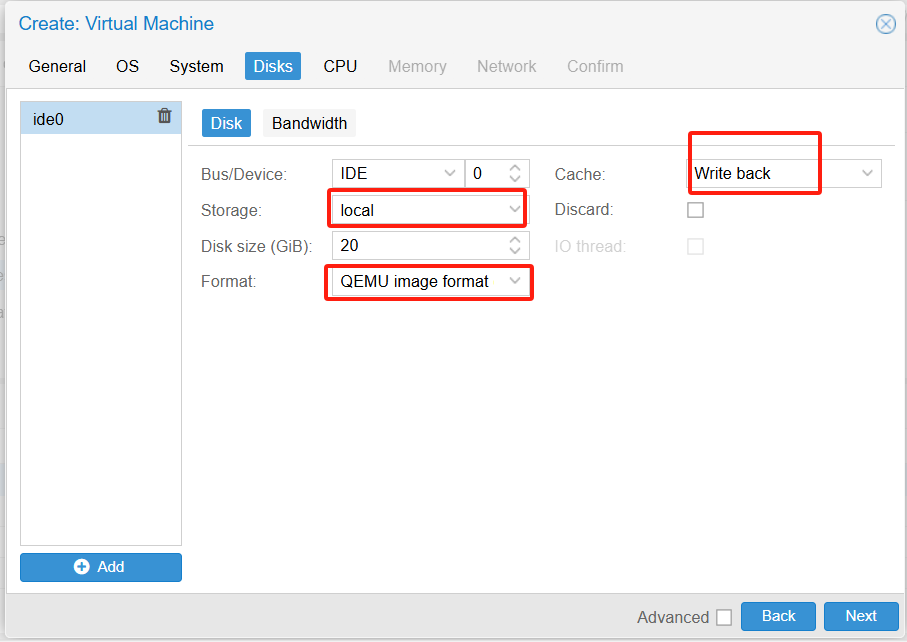
In the Disk window, select Write Back for Cache, enter your desired disk size in Disk size (GiB) (generally not less than 20), and choose the storage location in Storage. In this example, only the system disk local is available, so local is selected. Then click Next.
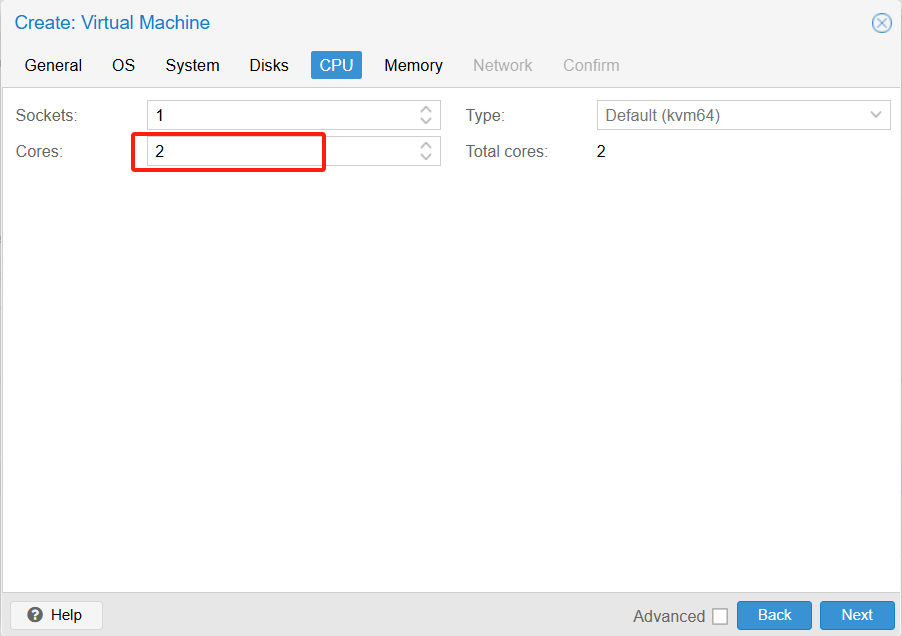
In the CPU window, enter the number of cores needed in Cores, then click Next.
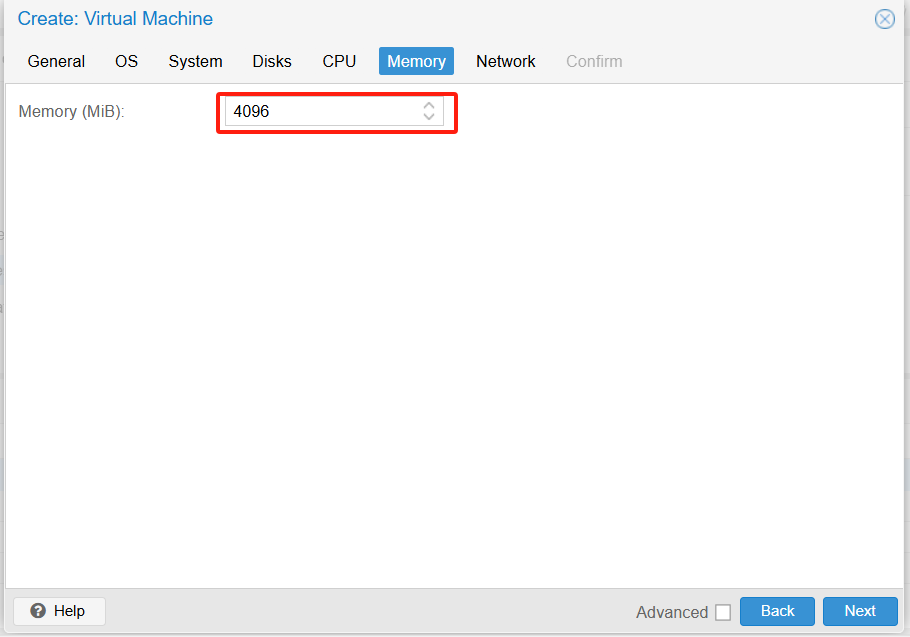
In the Memory window, enter the desired memory size in Memory (MiB), then click Next.
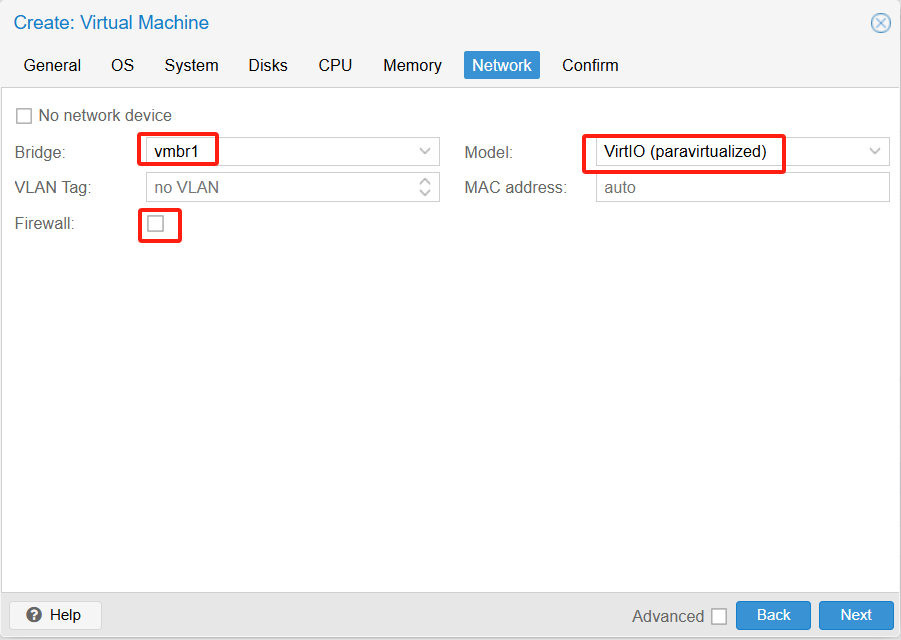
In the Network window, select vmbr1 for Bridge, VirtIO (paravirtualized) for Model, uncheck Firewall, then click Next.
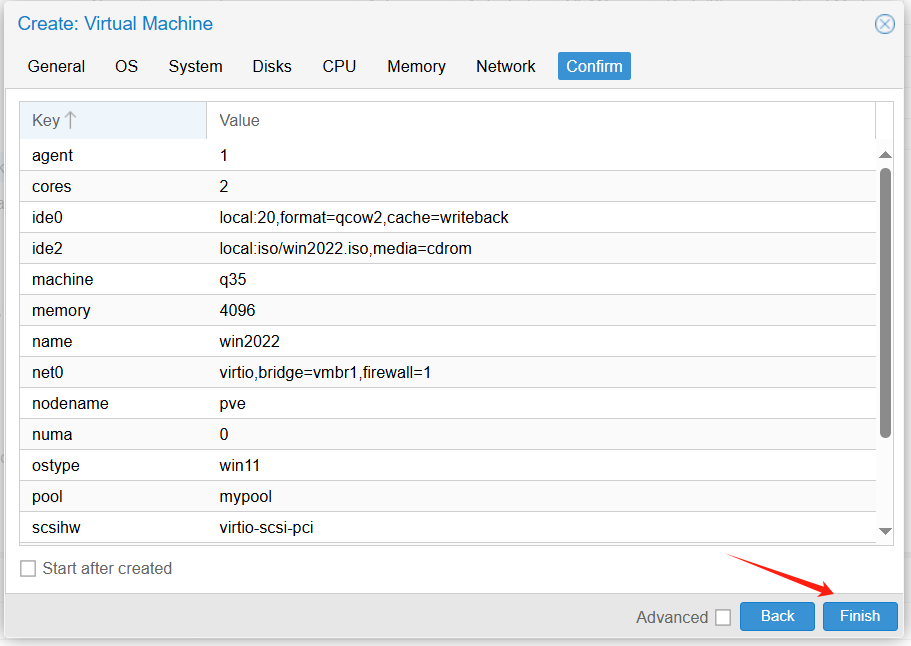
In the Confirm window, click Finish.
3. Graphical Installation Configuration
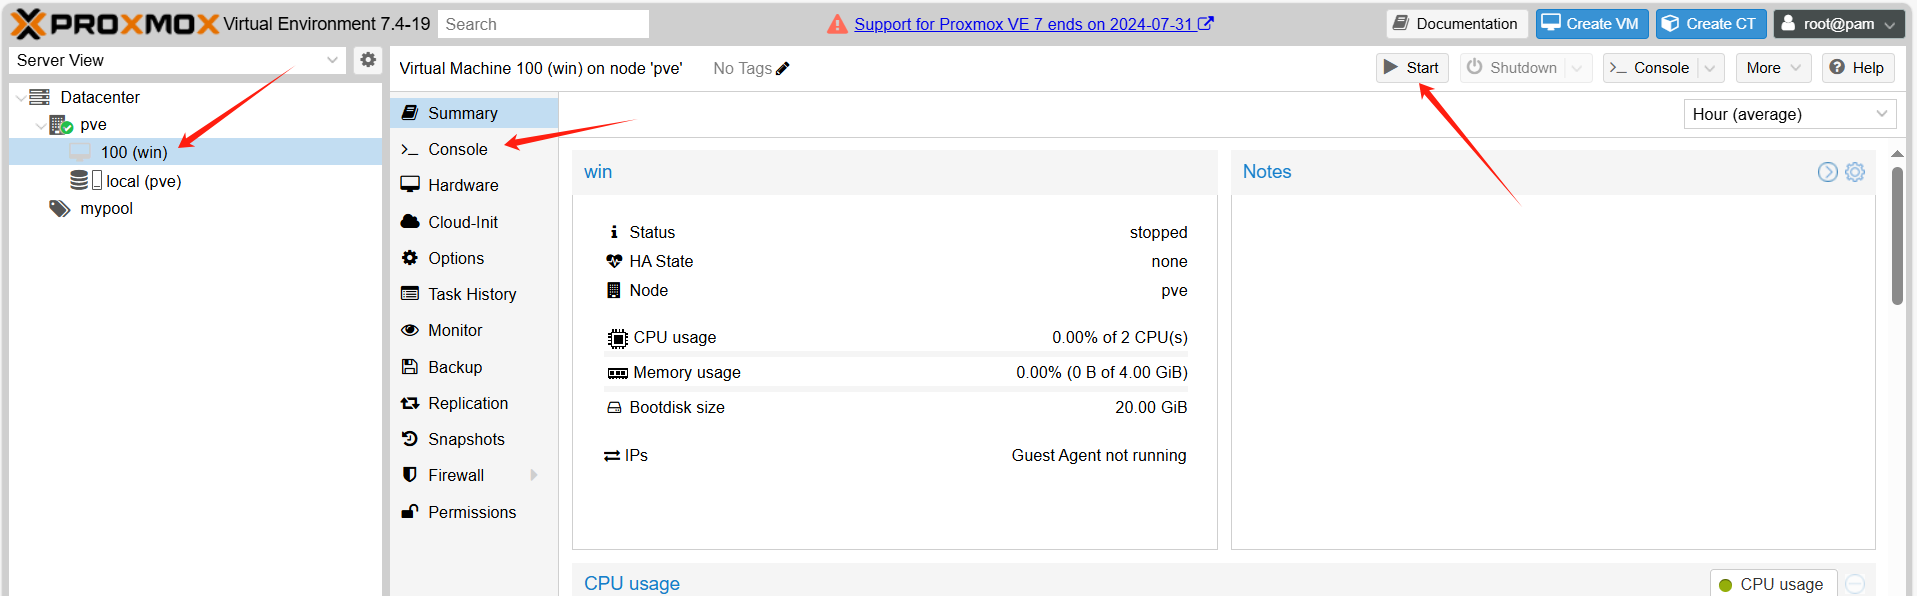
Click on the template you've set up on the left, click Start in the upper right corner to start the virtual machine, then click Console to enter the VNC interface and wait for the operating system to boot.
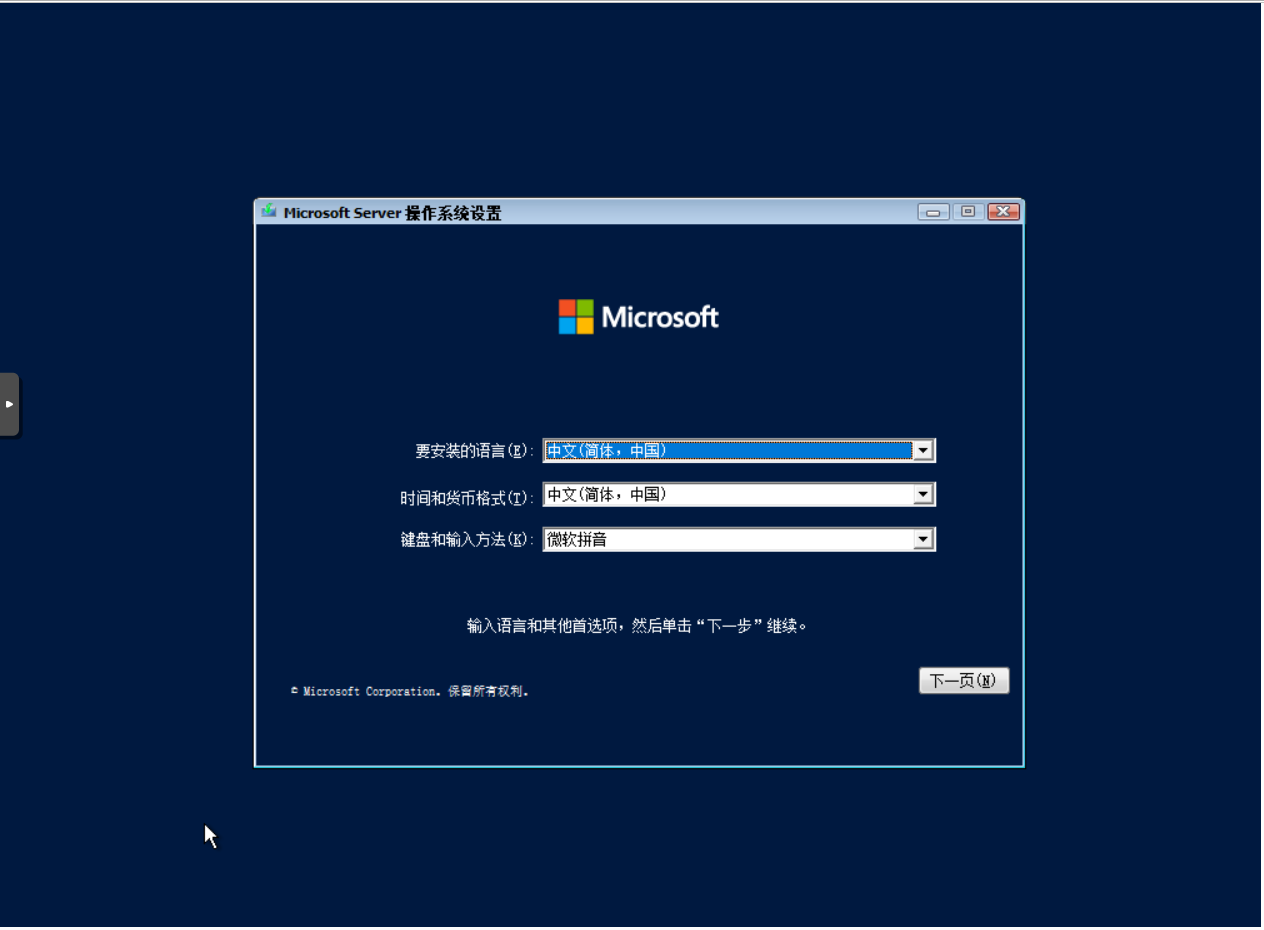
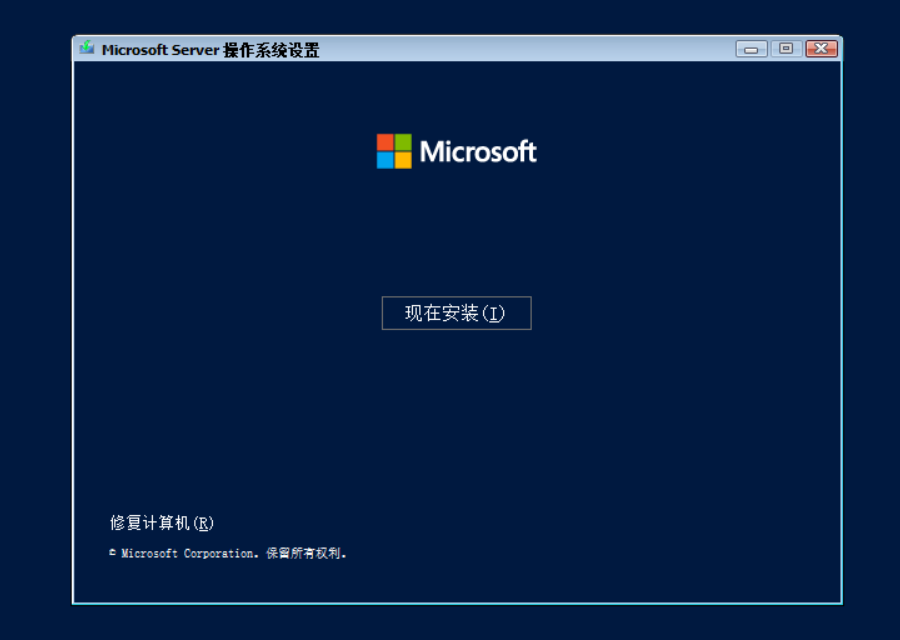
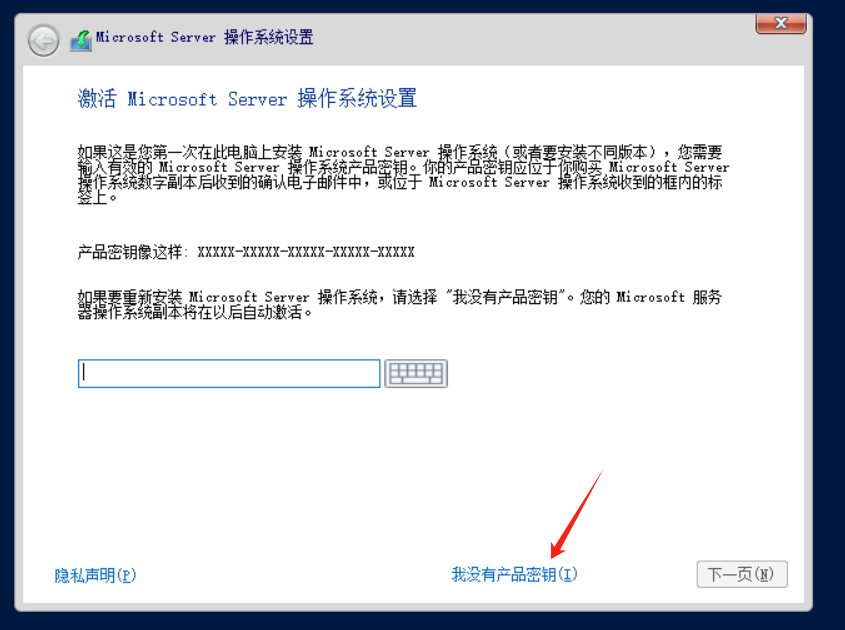
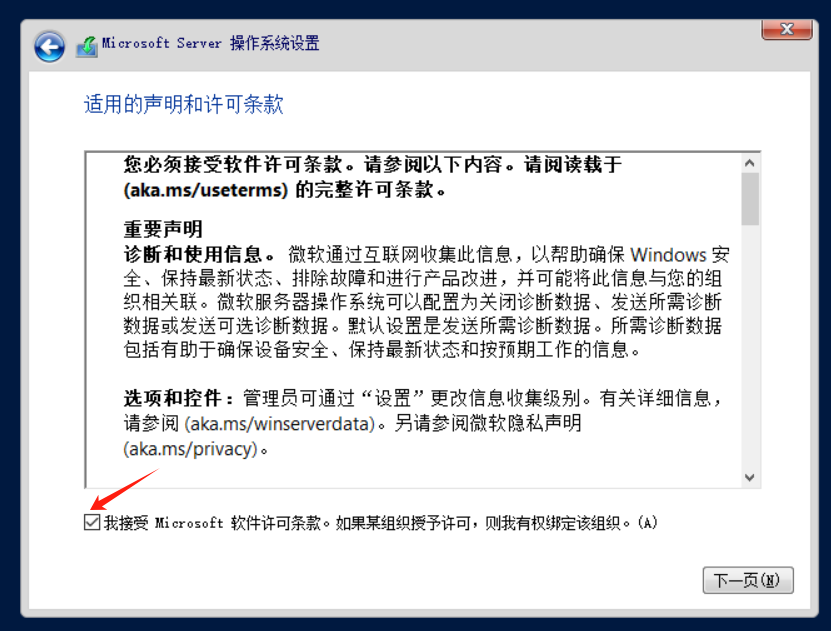
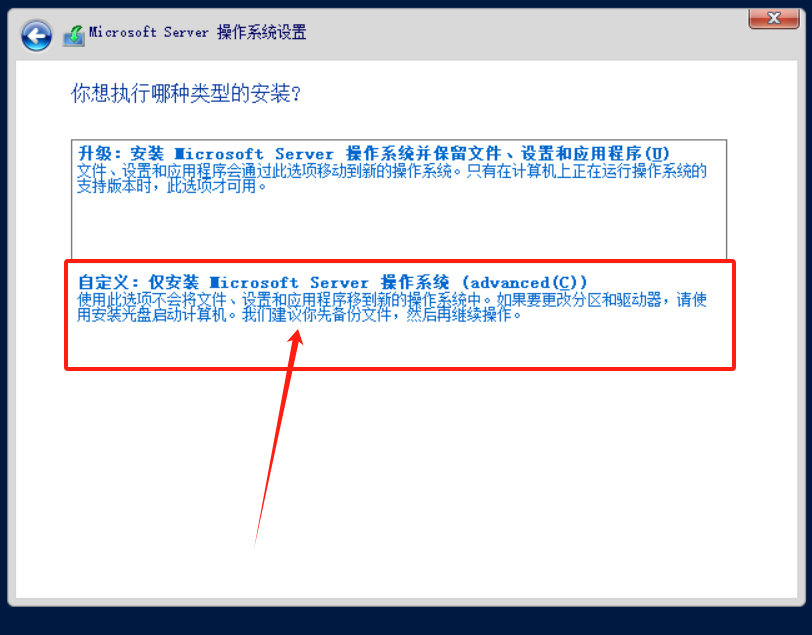
In the VNC, click Next, then Install now, then I don't have a product key, check Accept license, click Next, and then select Custom installation.
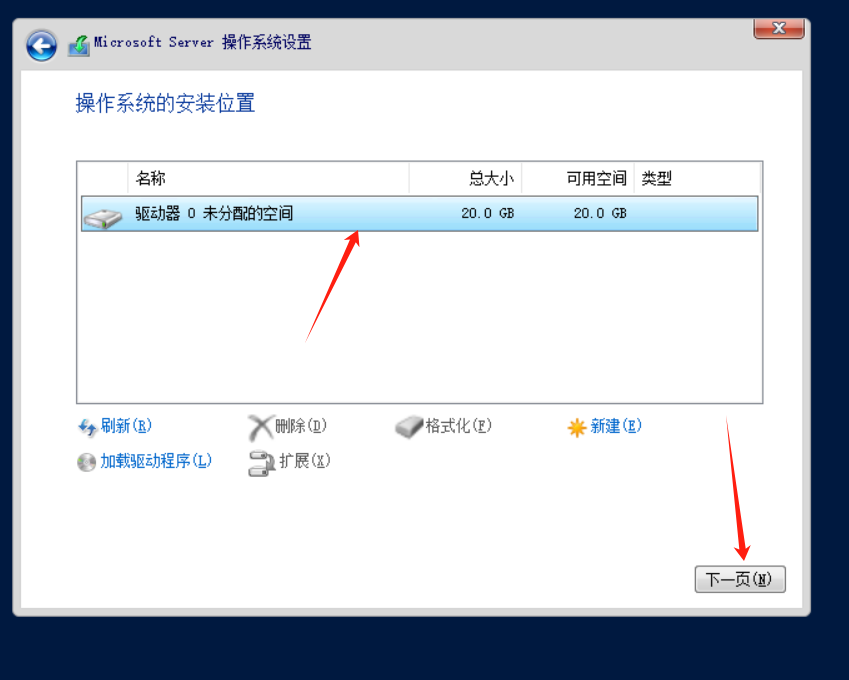
If the image comes with VirtIO drivers, you should be able to see the available system storage disk and its size. Select it and click Next.
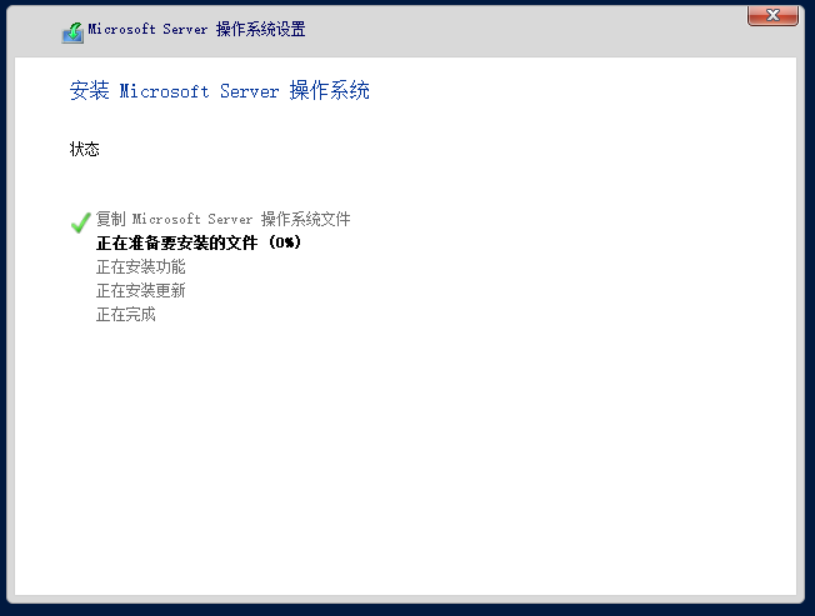
Wait for the system to install. It may restart automatically several times and could take more than 10 minutes.
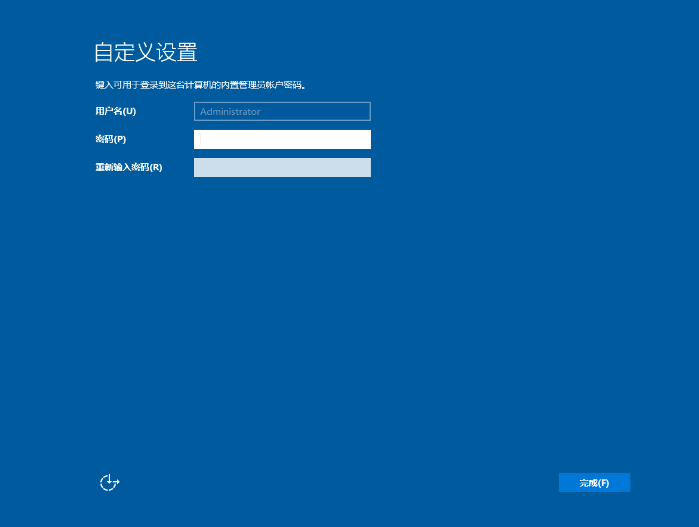
After installation is complete, you'll be asked to set a password during first login.
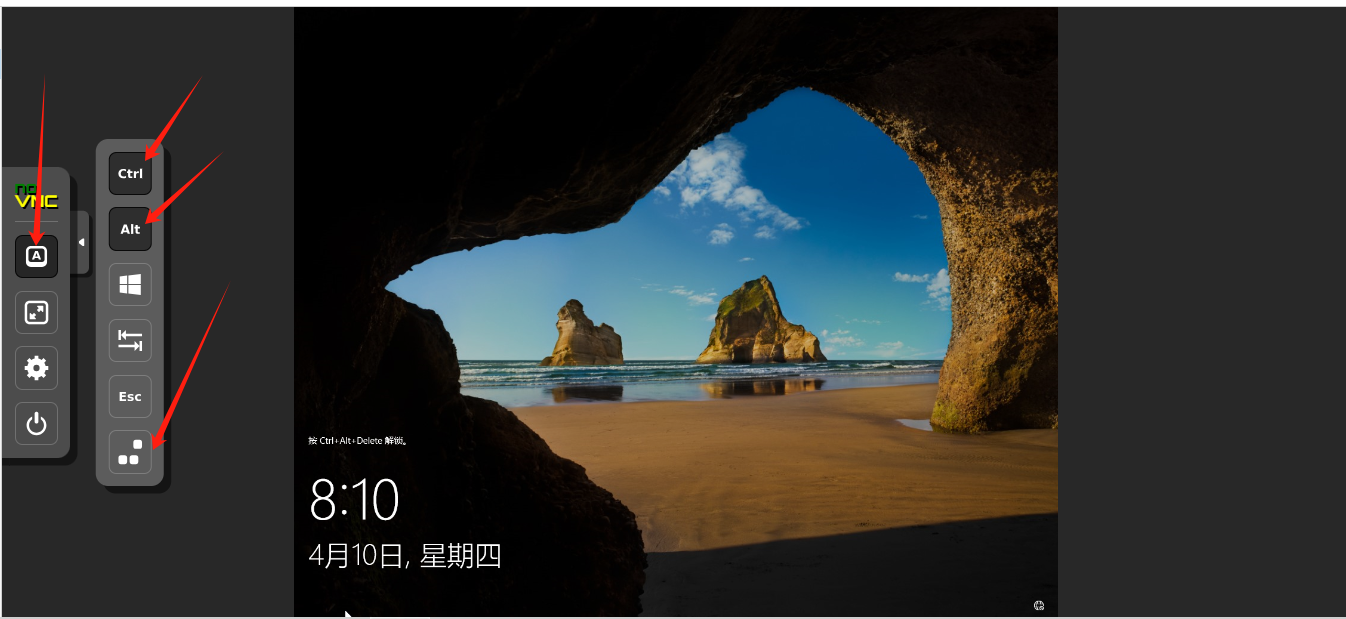
Once setup is complete, there's a pop-up box on the left side of the NOVNC page. Click the first button, then follow the login prompt by pressing Ctrl+Alt+last button to enter the login page.
4. Network Initialization
Since the PVE is set up with a static network through this project, you need to manually modify the bound IP address after logging in, rather than using DHCP.
Right-click in the bottom right corner of the desktop and select Open Network and Internet settings. In the settings page that appears, click Change adapter options. 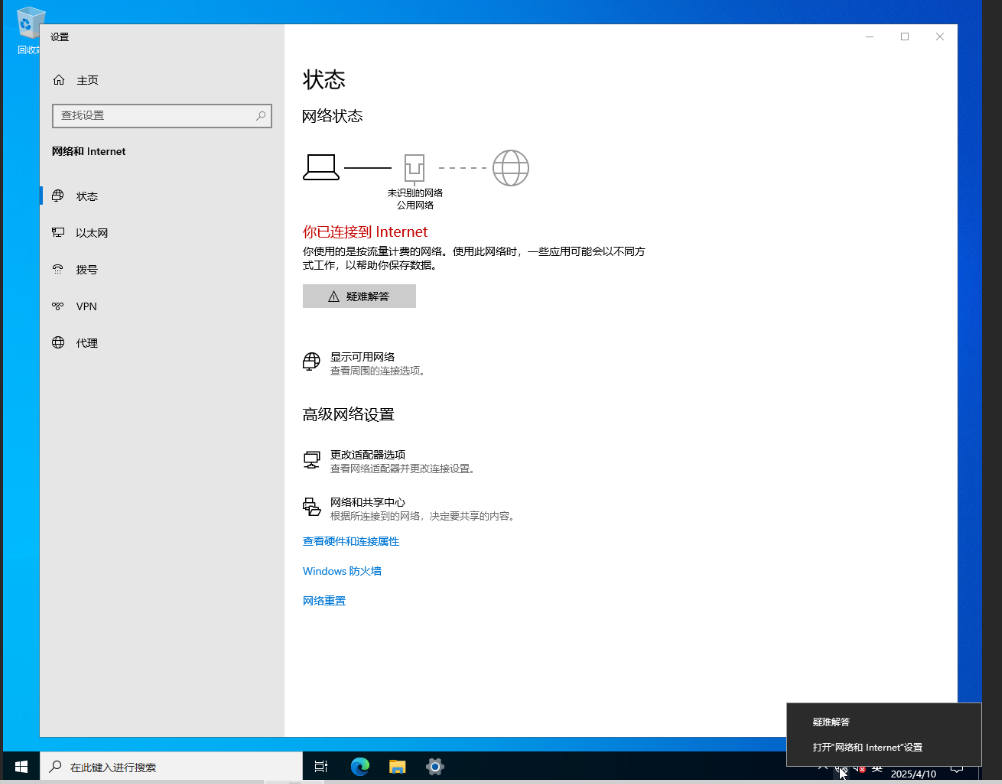
In the Network Connections, select Ethernet and click Change settings of this connection. 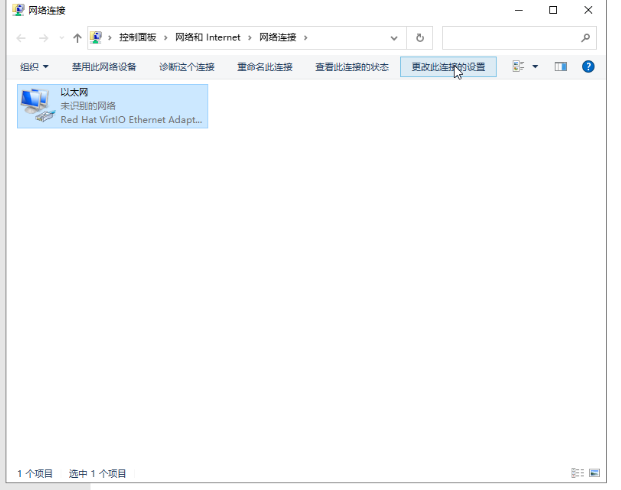
In the popup window, select Internet Protocol Version 4 (TCP/IPv4) and click Properties. 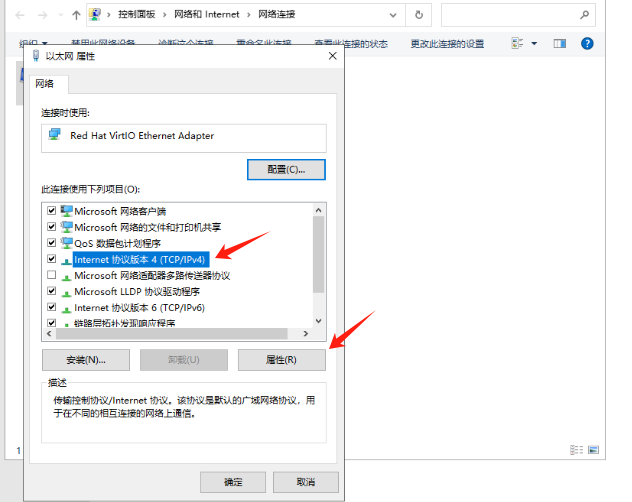
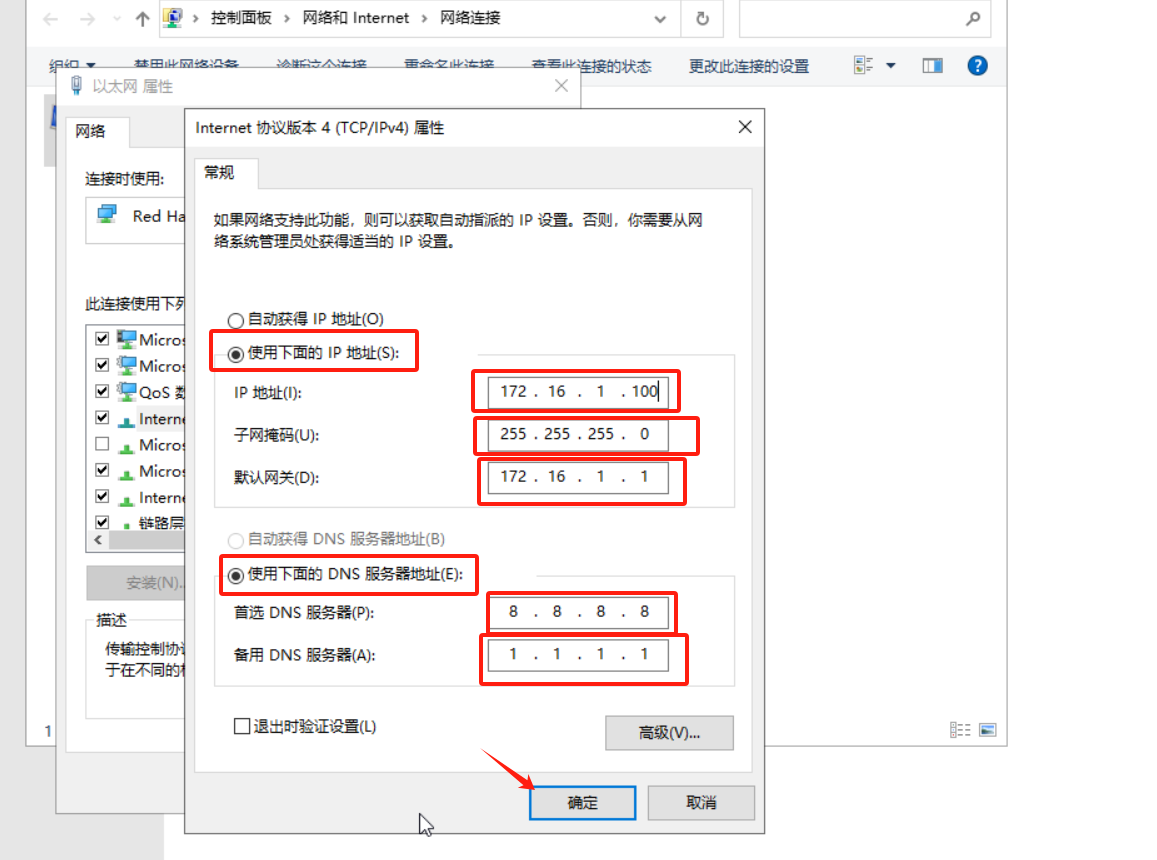
In the new dialog box, select Use the following IP address and enter: IP address(I): 172.16.1.xxx (replace xxx with your desired IP, I used 100 for convenience as my vmid is 100) Subnet mask(U): 255.255.255.0 Default gateway(D): 172.16.1.1
Then select Use the following DNS server addresses and enter:
8.8.8.8
144.144.144.144Click OK in the bottom right corner, and make sure Validate settings upon exit is NOT checked.
Click OK and Yes for any other dialog boxes, and your virtual machine will now have network connectivity.
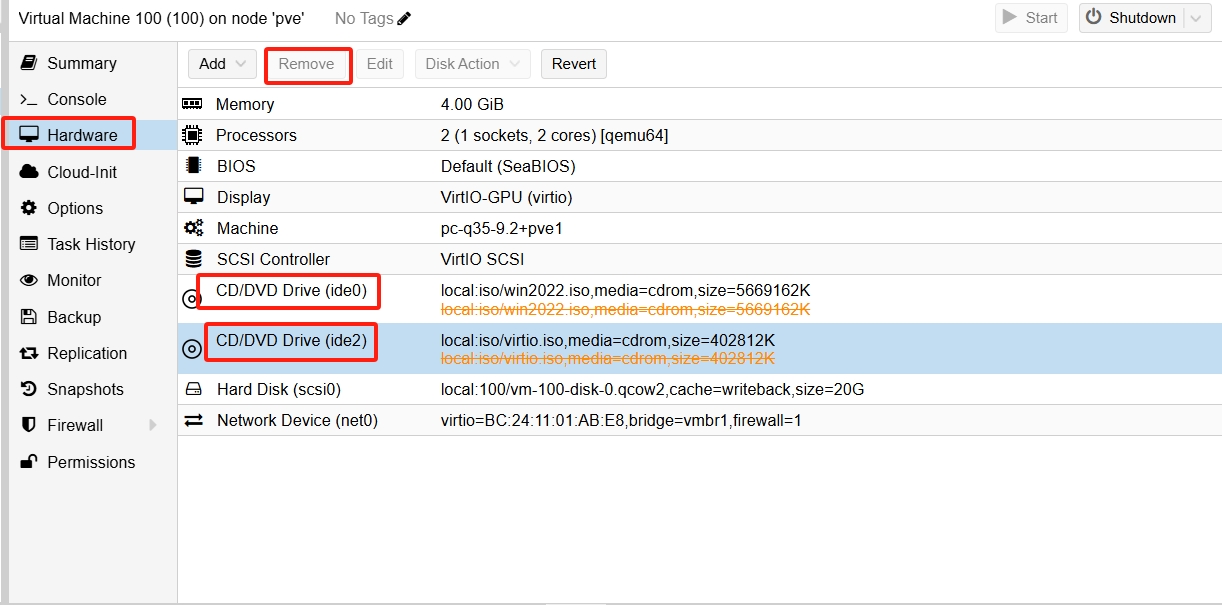
5. Unmounting the CD Drive
In Proxmox VE, open the VM Hardware tab, select the corresponding CD device, click Remove, then restart the VM.
Using ISO Images without VirtIO for VM Installation
1. Download Images
For Windows images without VirtIO, you can use:
https://github.com/ILLKX/Windows
For VirtIO ISO images, you can use:
https://fedorapeople.org/groups/virt/virtio-win/direct-downloads/archive-virtio/
Alternatively, you can download just the MSI package, package it into an ISO format locally, and then upload it to ProxmoxVE.
This way, the package is smaller. The official package contains support for all Windows images and is about 500MB, while a self-packaged one is around 5MB.
2. VirtIO Import
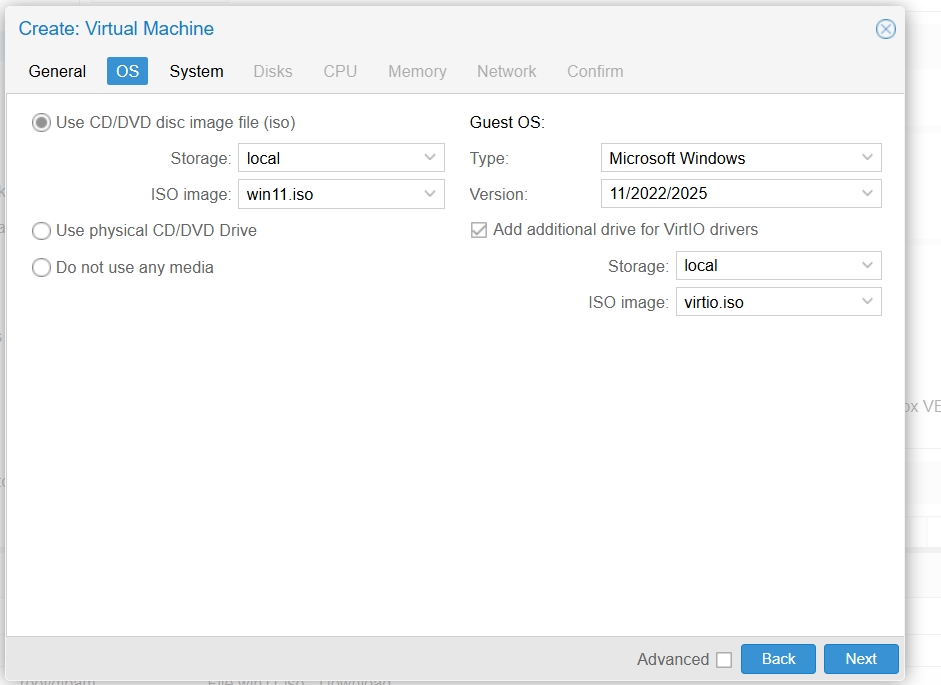
Note that in ProxmoxVE version 8.x and later, you can select VirtIO boot loading by default in the OS section, as shown in the image:
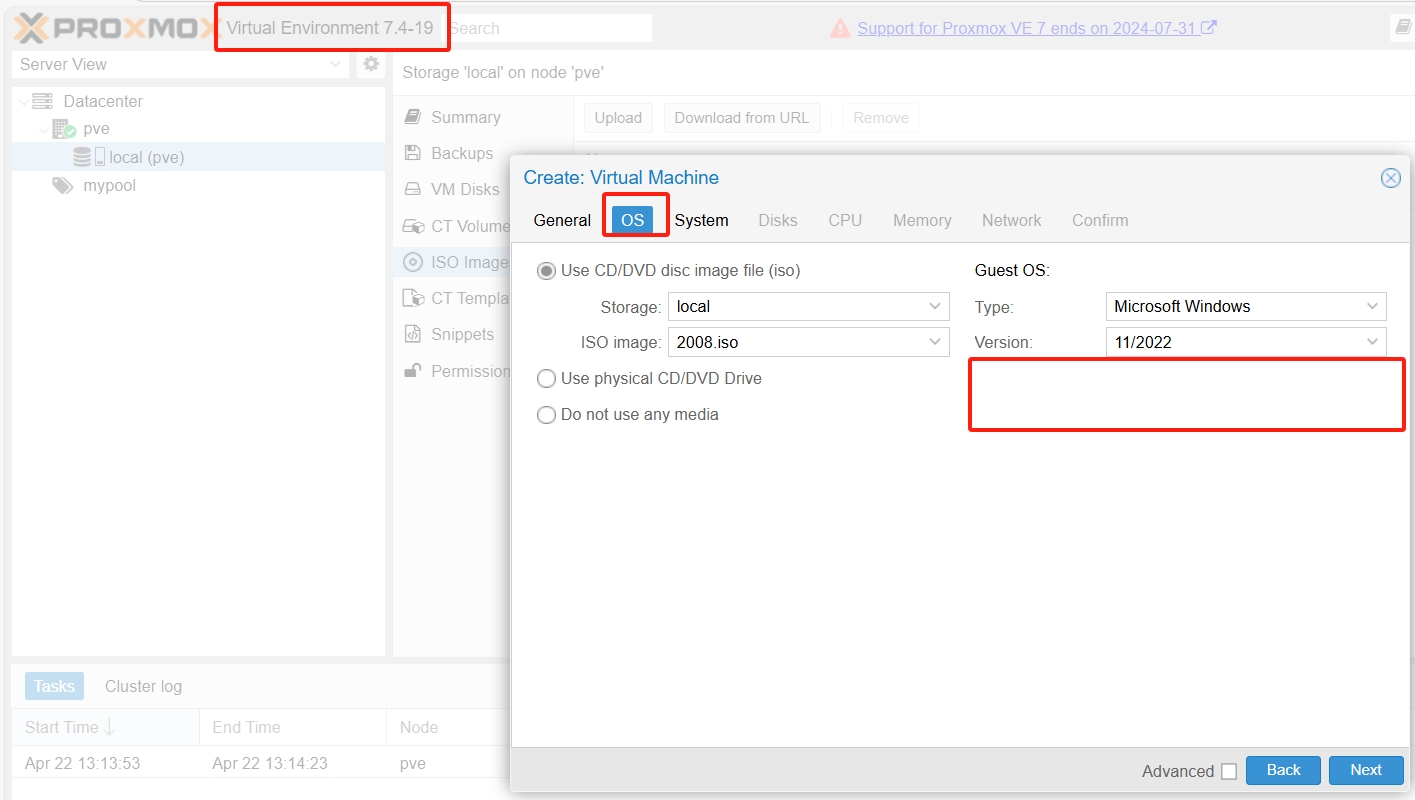
In lower versions of ProxmoxVE, such as 7.x and 6.x, you cannot select VirtIO boot loading by default in the OS section:
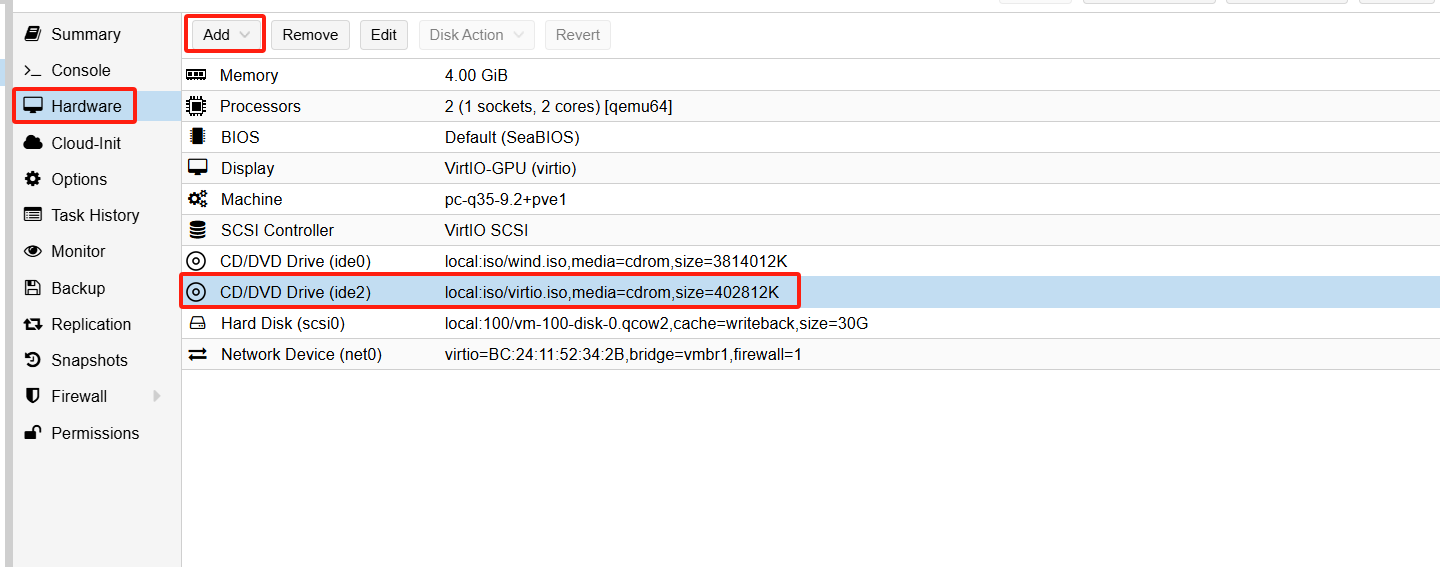
You need to manually add CD/DVD Drive by clicking Add in the Hardware section and selecting the downloaded VirtIO ISO file:
Then proceed as usual until you reach:
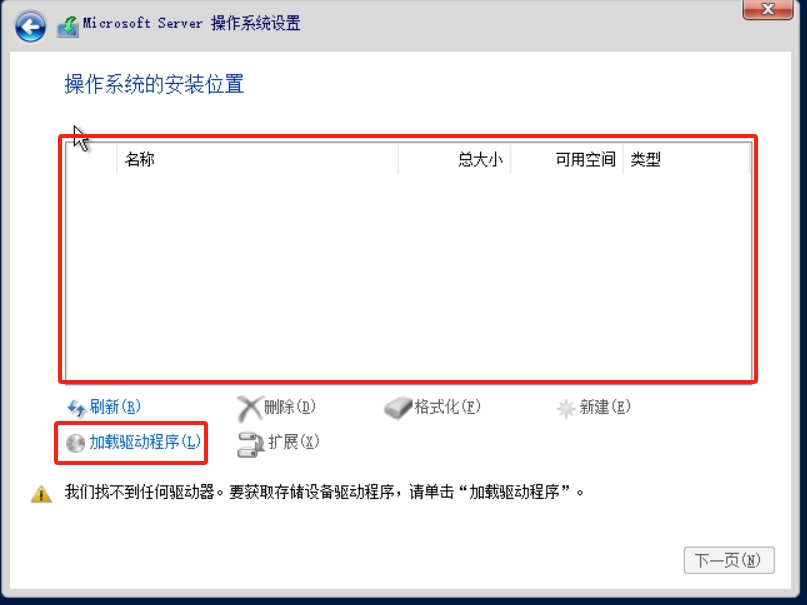
At this point, you can't find the hard disk. You need to select Load Driver:
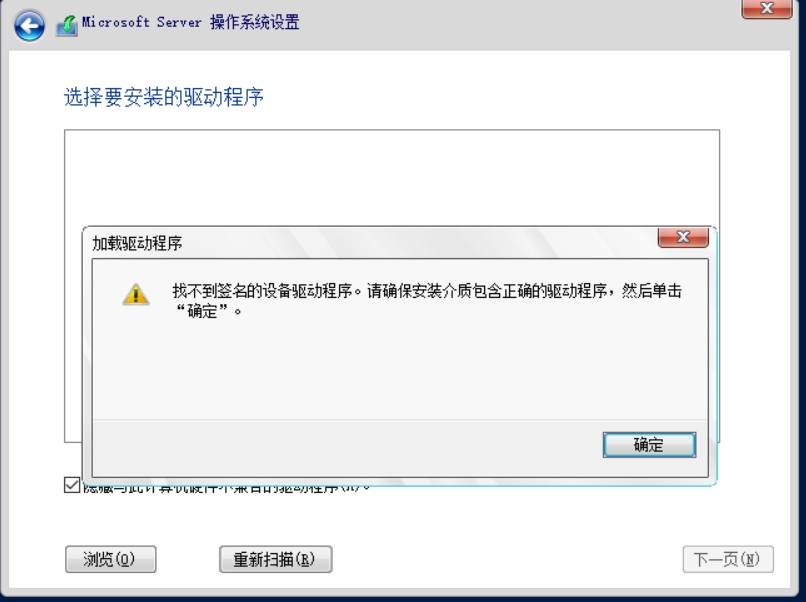
Then select the VirtIO as your driver disk, click open, and import the corresponding system driver from the amd64 directory:
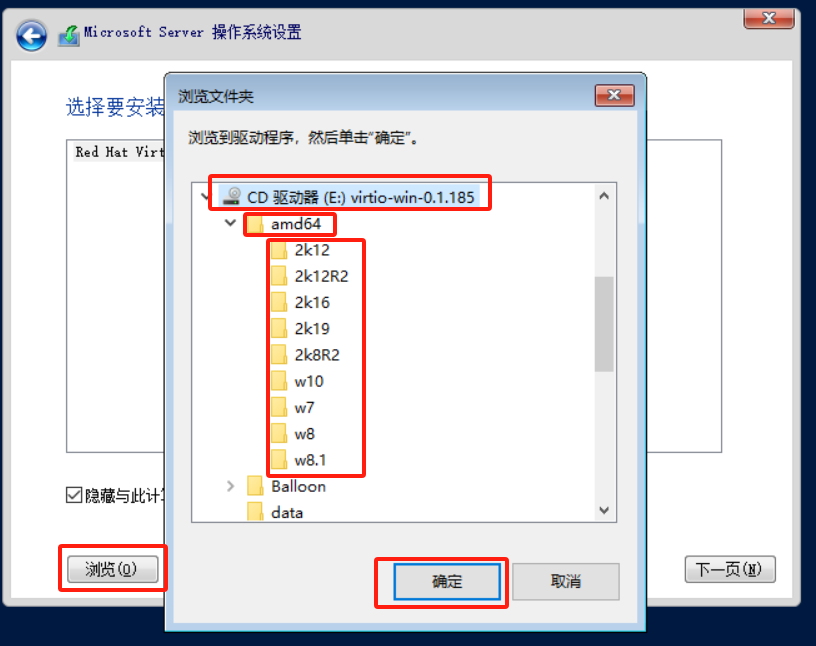
I'm using a Windows Server 2019 image, so I imported the 2k19 driver. After importing, select the imported driver and click Next:
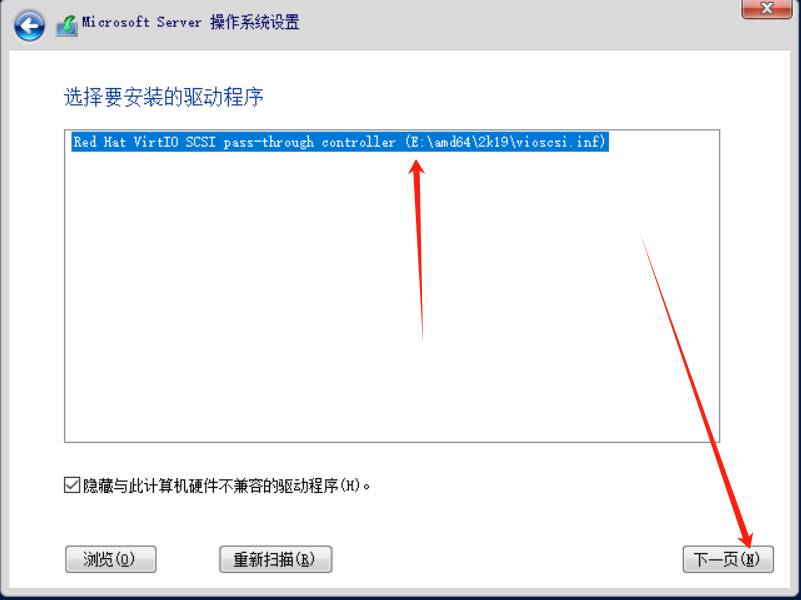
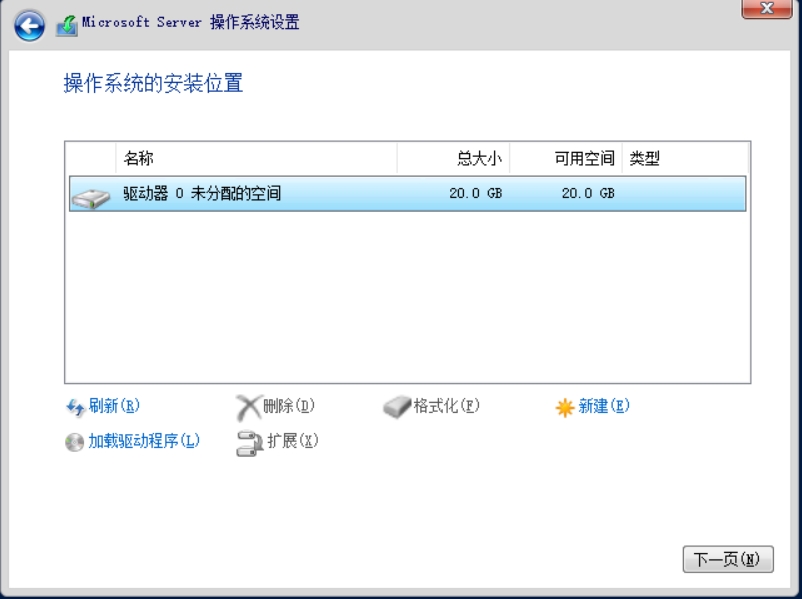
Now you should be able to see the hard disk. Select it and continue with the installation steps as in the previous tutorial until the system installation is complete and you reach the desktop.
3. Installing Drivers via virtio-win-guest-tools
Once successfully installed and at the desktop, you still need to manually install the drivers.
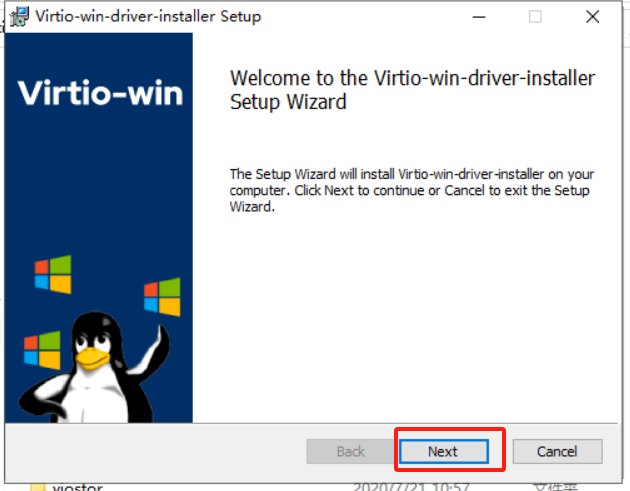
Open the VirtIO driver's CD drive directory. At the bottom, there's a virtio-win-guest-tools program that will install the required VirtIO drivers, including the VirtIO network card driver:
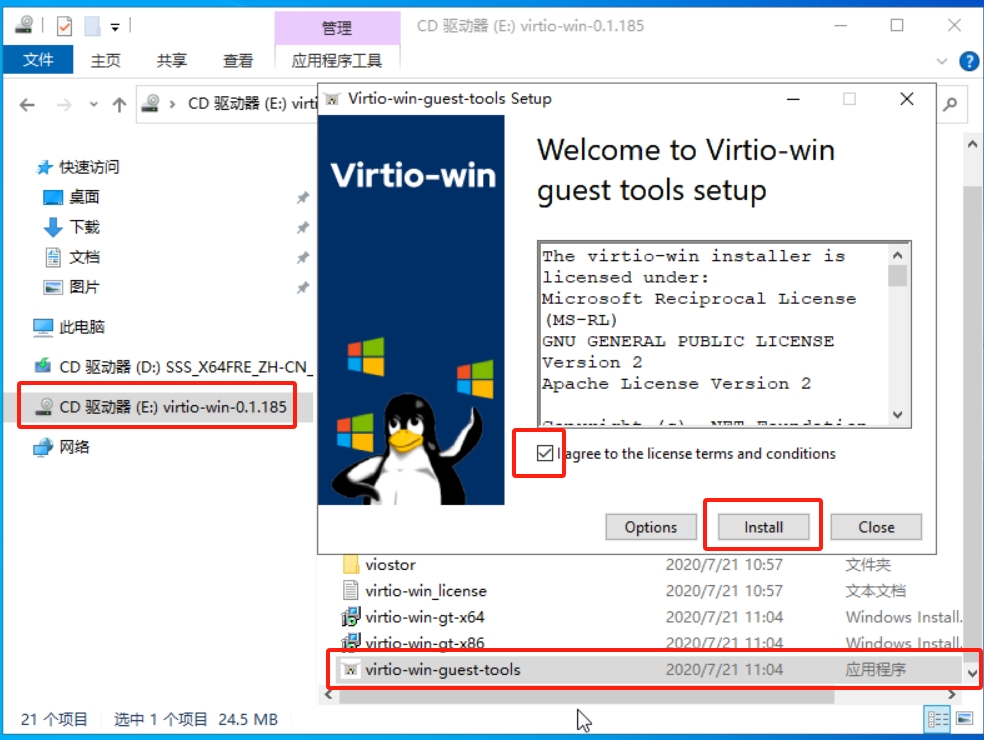
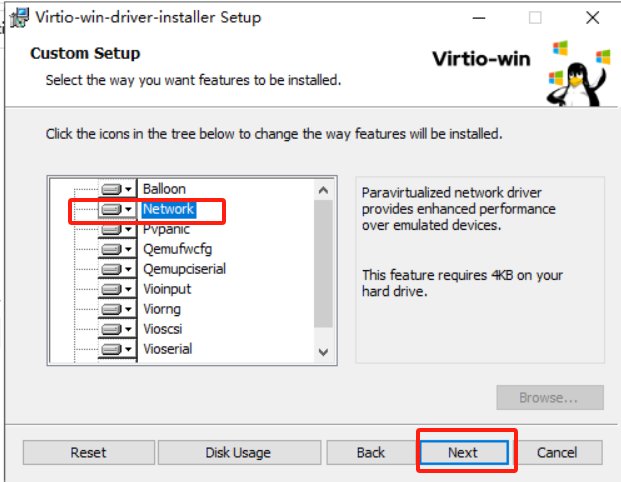
After clicking install, the network card driver will be installed. For subsequent network settings, refer to the network initialization tutorial mentioned earlier.
4. Installing Network Card Driver (Alternative)
After successful installation and reaching the desktop, you may still need to manually install the network card driver to connect to the network:
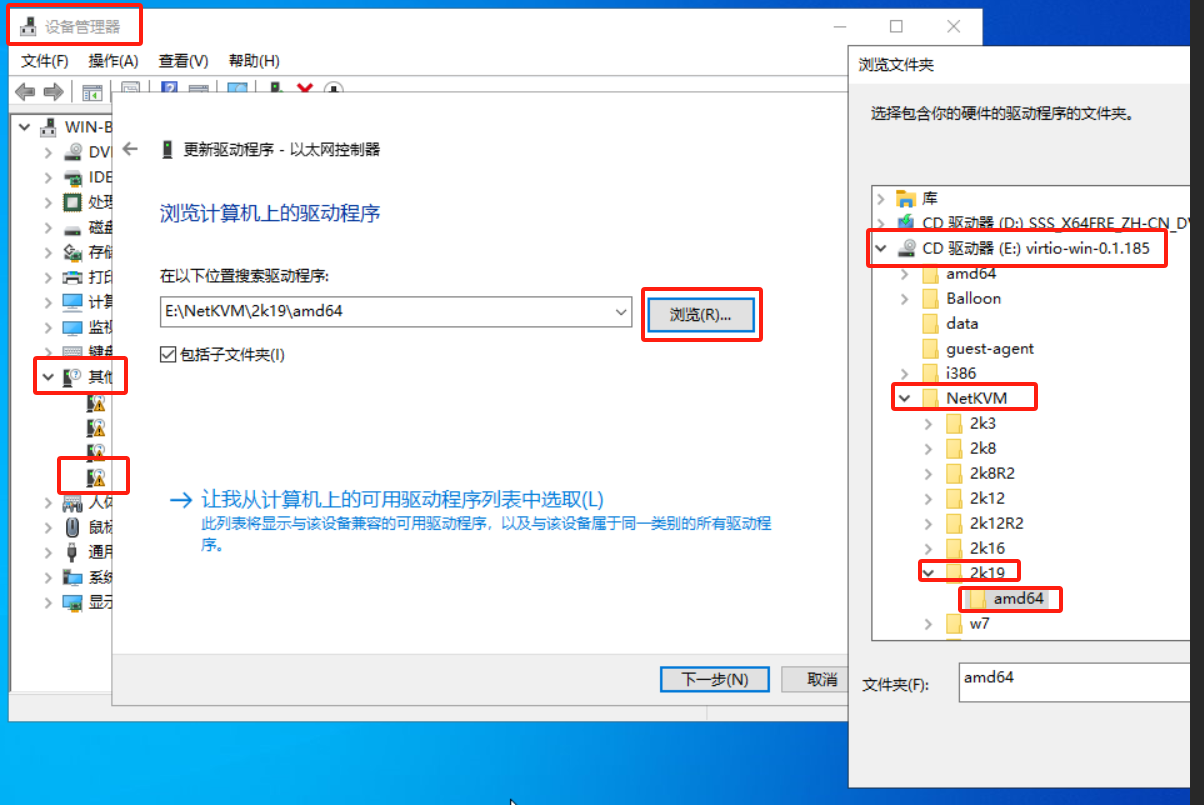
- Open Control Panel → Device Manager
- Find the Ethernet Controller, right-click and select Update Driver
- Select Browse my computer for driver software (R)
- Browse to the
VirtIOdriver'sCDdrive directory - Open the NetKVM folder
- Select the driver folder corresponding to your current system version (like the above operation, I would choose the 2k19 folder with amd64 drivers)
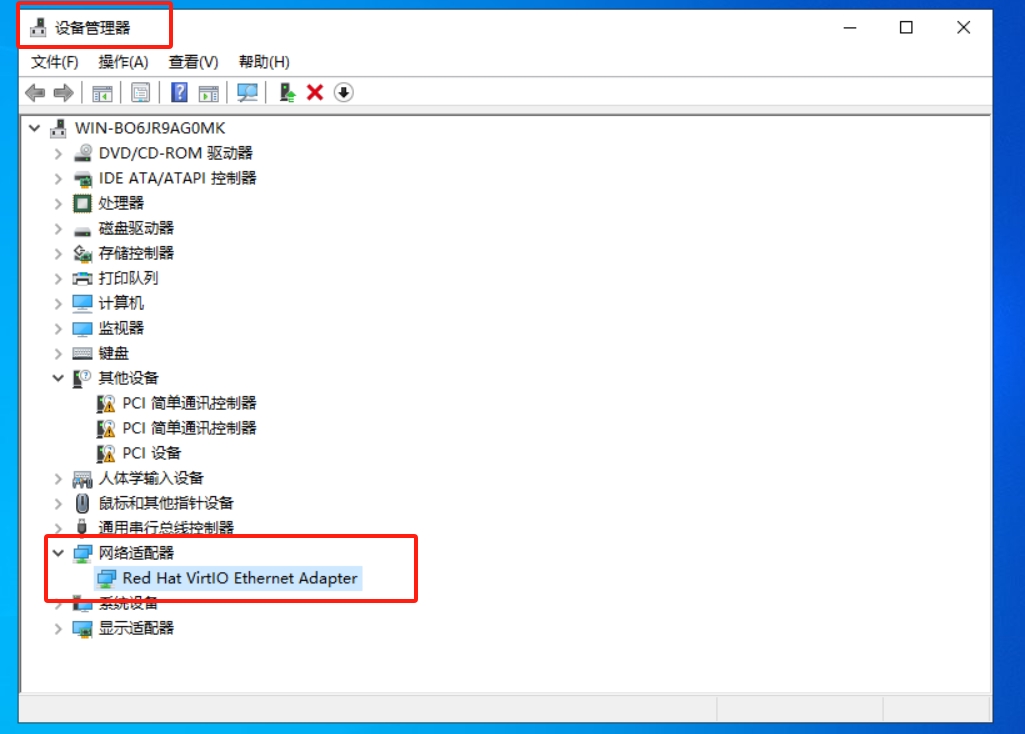
- Confirm the installation, and after completion, the
VirtIOnetwork card driver will be successfully loaded
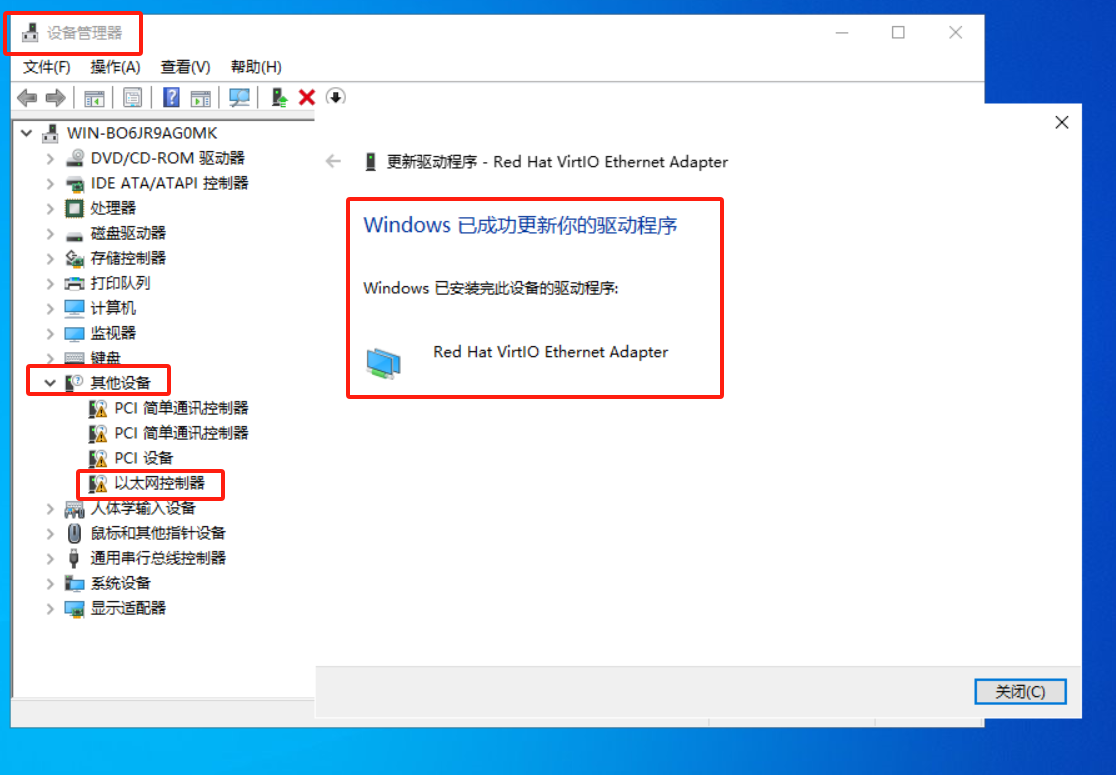
For subsequent network settings, refer to the network initialization tutorial mentioned earlier.
5. Unmounting the CD Drive
In the ProxmoxVE web interface, manually click on the corresponding CD in the Hardware section, select Remove, and then restart the virtual machine. This way, you can use it directly:
The old Windows image only includes Internet Explorer.
Manually enter the following URL in IE: https://www.microsoft.com/zh-cn/edge/download to download the file.
Since IE does not automatically whitelist certificates, multiple pop-ups will appear. Click “Add Domain,” save the changes, and only then will the download button appear on the page.
Additionally, older systems lack the WebView2 component by default. A prompt will appear indicating that this component must be downloaded and installed separately to enable modern browser functionality.