Running Windows Virtual Machines in LXD
Verify the LXD Driver
Ensure that lxc info output contains qemu, otherwise you cannot create VMs:
lxc info | grep -i driver:If it only shows lxc, no need to read the subsequent tutorials, lxd drivers don't support opening a VM.
Prepare the Environment and Patch the Image
Execute the following commands in sequence in the /root directory:
apt update
apt install -y snapd libguestfs-tools wimtools rsync libhivex-bin libwin-hivex-perl genisoimage || apt install -y mkisofs
snap install lxd-imagebuilder --classic --edge
# reboot to load some config
rebootDownload the image and apply the patch. If you're using a different image, replace the download link accordingly.
(You don't need to download the image that comes with virtio, the original image will suffice)
Windows image download link: https://github.com/ILLKX/Windows
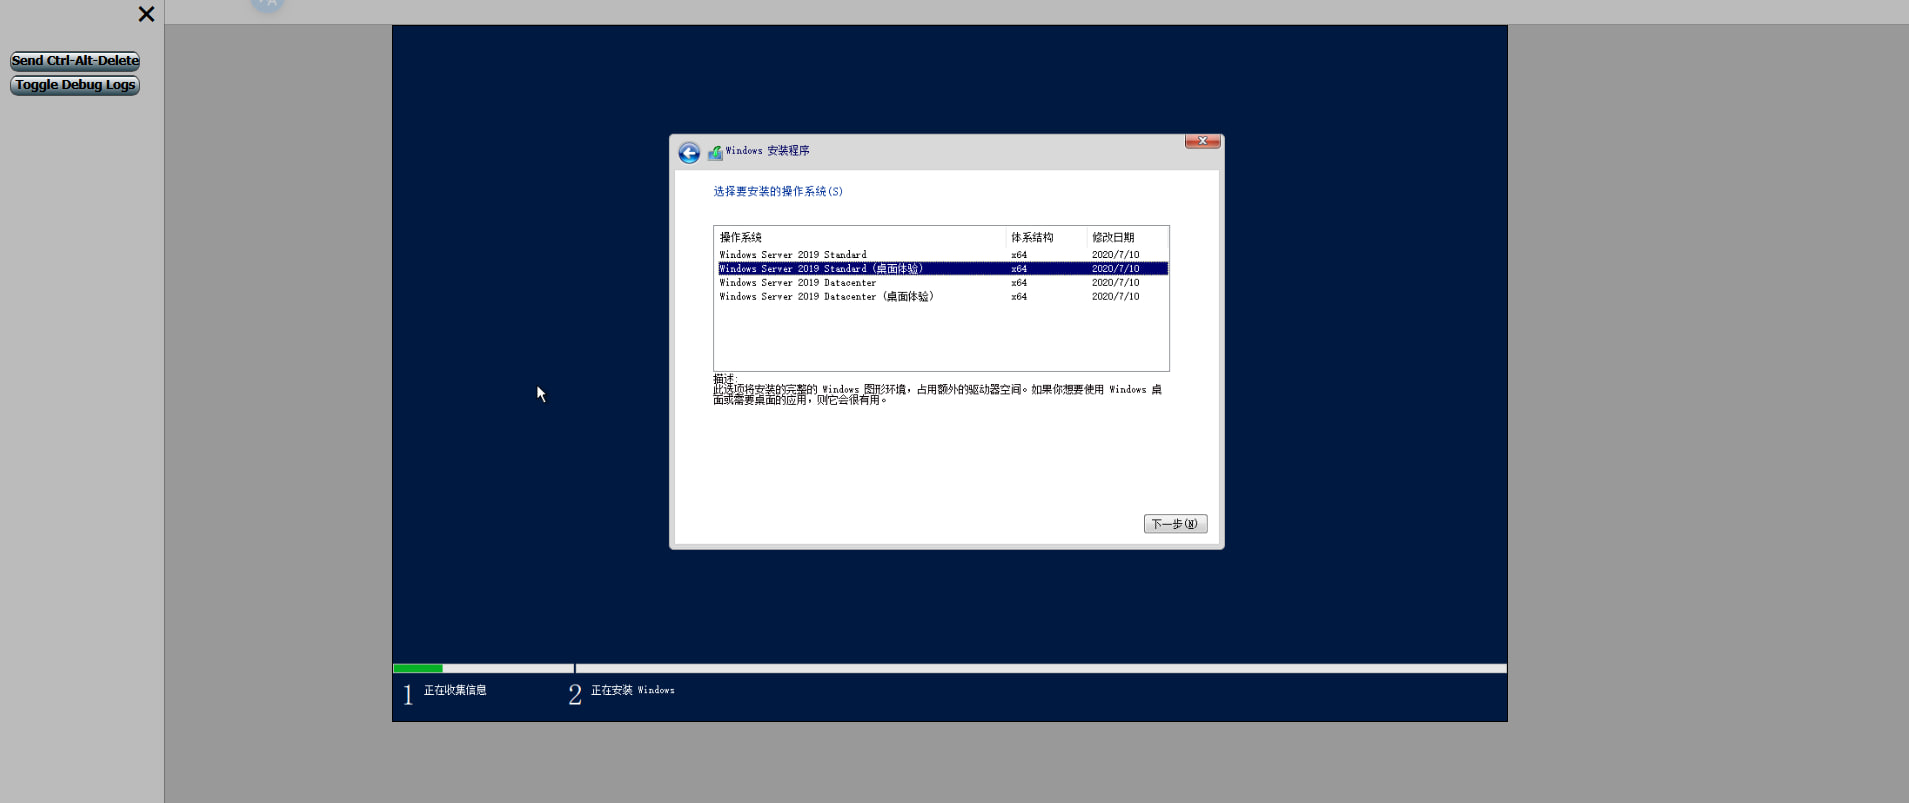
The following guide will use Windows 2019 as an example:
curl -sSL https://download.testip.xyz/Windows/zh-cn_windows_server_2019_x64_dvd_19d65722.iso -o win.iso
lxd-imagebuilder repack-windows \
  --windows-arch=amd64 \
  win.iso \
win.lxc.isoThe patching time depends on when the program adds the drivers needed for booting (it will add one by one until successful).
Some may take a short time, others may take longer, potentially exceeding 10~30 minutes. It's recommended to run this in screen or tmux.
After patching is complete, you can delete the original image:
rm -f win.isoCreate the VM and Mount the Installation ISO
Here I'm using a configuration of 3 CPUs, 5GB RAM, and 30GB storage. If you're using Windows 10 or newer versions, you'll need at least 4 CPUs, 6GB RAM, and 40GB storage.
It's recommended to use more CPU and RAM than the resources I have set up now to avoid the system getting stuck to the point of crashing.
If you don't have enough memory, we recommend checking the Add SWAP item in the Other Useful Items section of this guide to add more virtual memory on your own.
lxc init winvm --vm --empty
lxc config device override winvm root size=30GiB
lxc config set winvm limits.cpu=3 limits.memory=5GiB
lxc config device add winvm vtpm tpm path=/dev/tpm0
lxc config device add winvm install disk source=/root/win.lxd.iso boot.priority=10Start the VM and Access the Desktop Remotely via Browser
Install the components needed for browser access:
apt update
apt install -y spice-html5 websockify lsofStart the VM:
lxc start winvmStart remote access components:
SERVER_IP=$(hostname -I | awk '{print $1}')
nohup websockify --web /usr/share/spice-html5 6080 --unix-target=/var/snap/lxd/common/lxd/logs/winvm/qemu.spice > /var/log/websockify-winvm.log 2>&1 &
echo "SPICE HTML5 console on http://${SERVER_IP}:6080/spice_auto.html"At the first boot, you'll need to press the Ctrl+Alt+Delete button in the upper left corner of the browser page. After restarting, follow the prompts on the default interface. You'll need to wait 5-10 minutes for the ISO to be loaded for the actual installation.
Eventually, the Zabbly icon will appear and spin for at least 2 minutes. Please be patient.

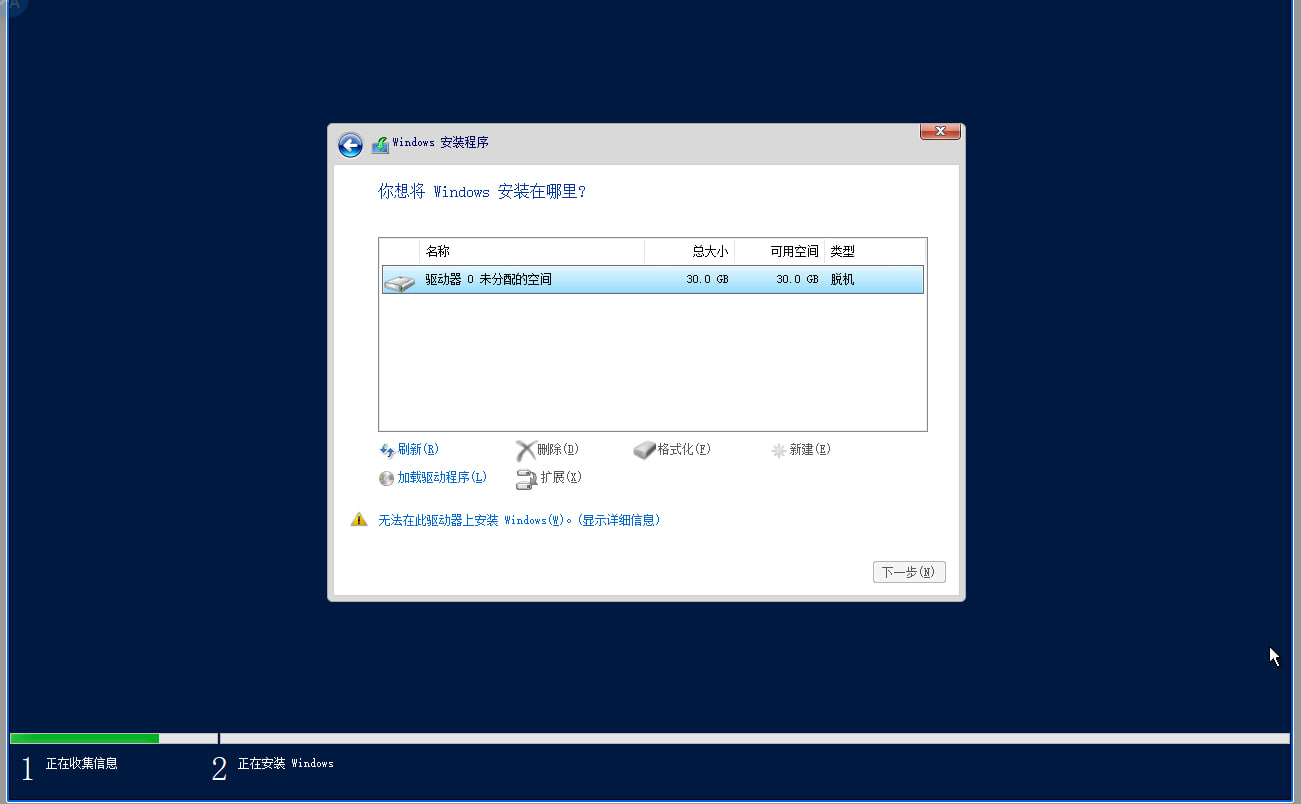
Once the spinning stops, you'll enter the normal Windows VM installation process, similar to PVE operations.

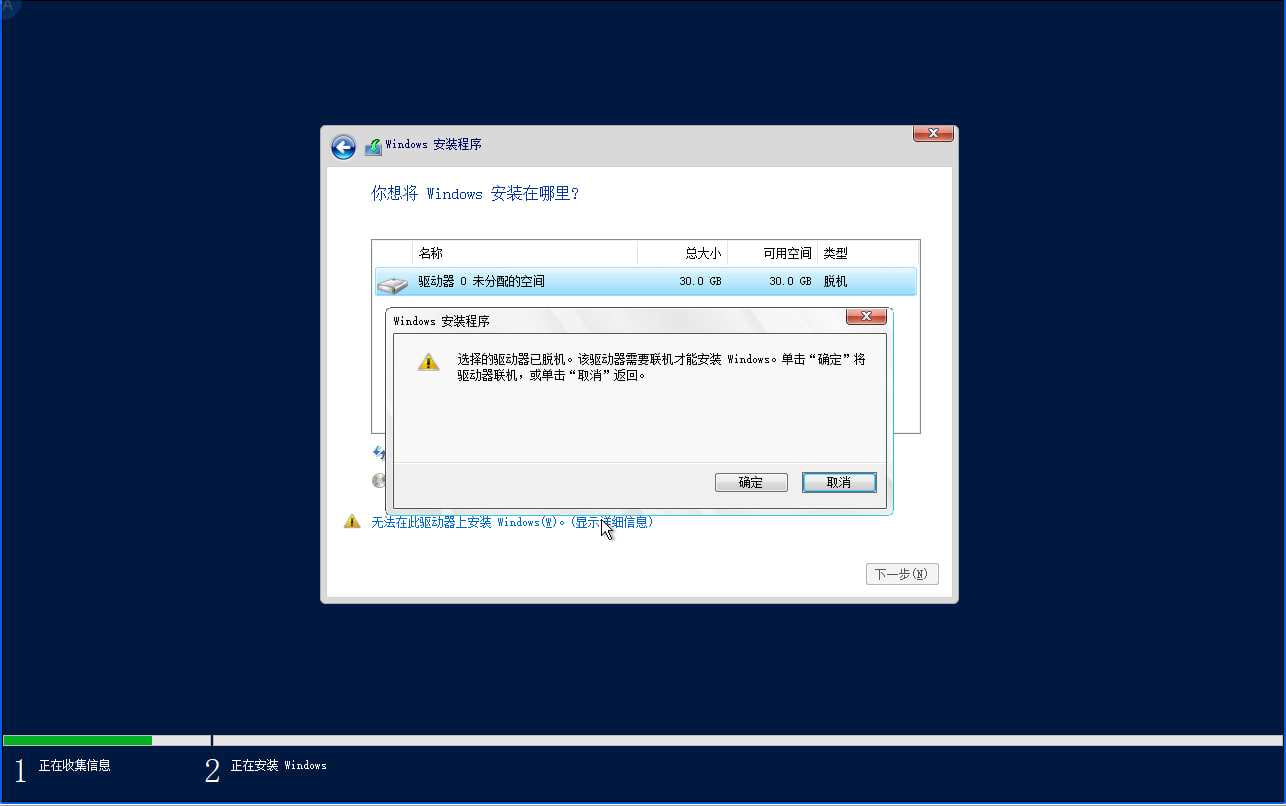
If the disk is not selectable at this step, follow the yellow hint in the lower-left corner and set the disk from offline to online, then confirm. The disk will become selectable afterward.

After installation, the VM may reboot several times while network setup is finalized. In the SPICE web console you should see the user setup screen. In parallel, run lxc list to confirm network attachment.
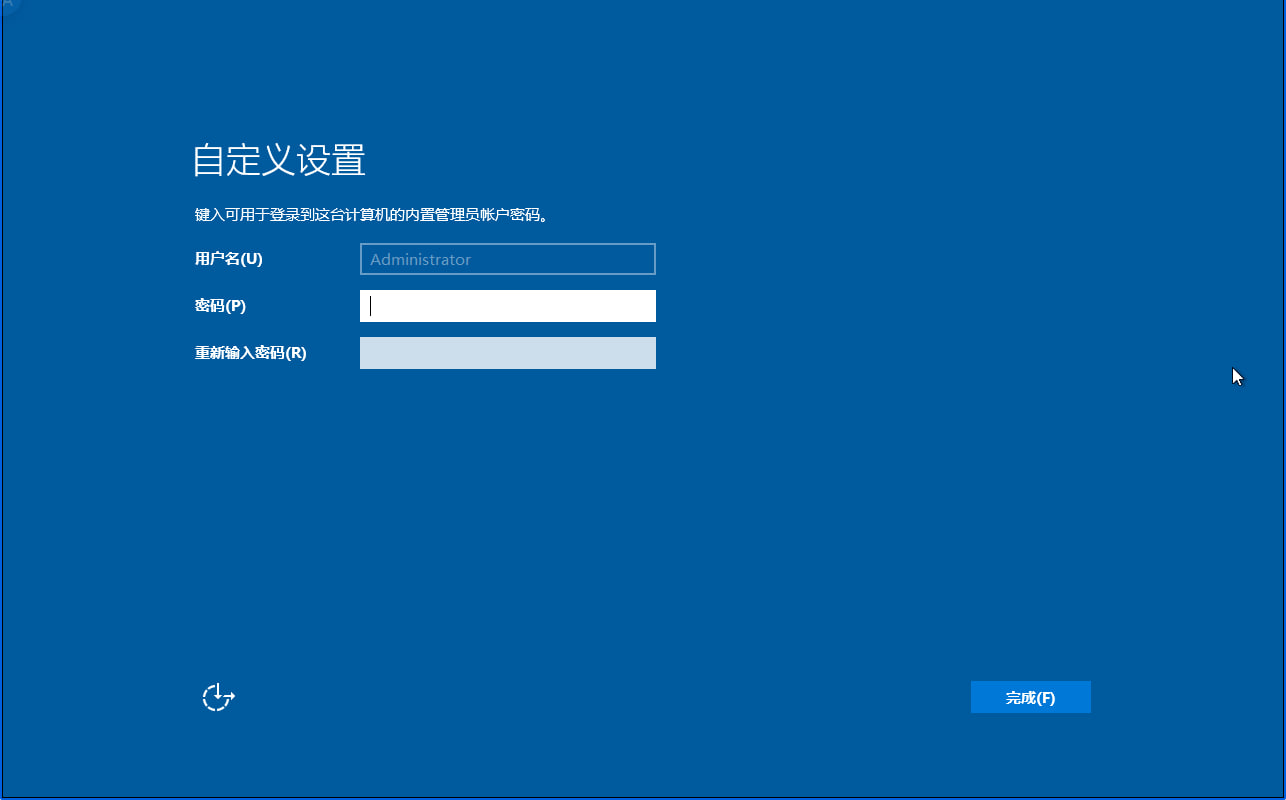

After setting up the user to enter the system login page, execute the following command to shut down/exit Windows, then remove the ISO device to ensure that the next boot is from the hard disk, and then start the virtual machine again.
lxc stop winvm
lxc config device remove winvm install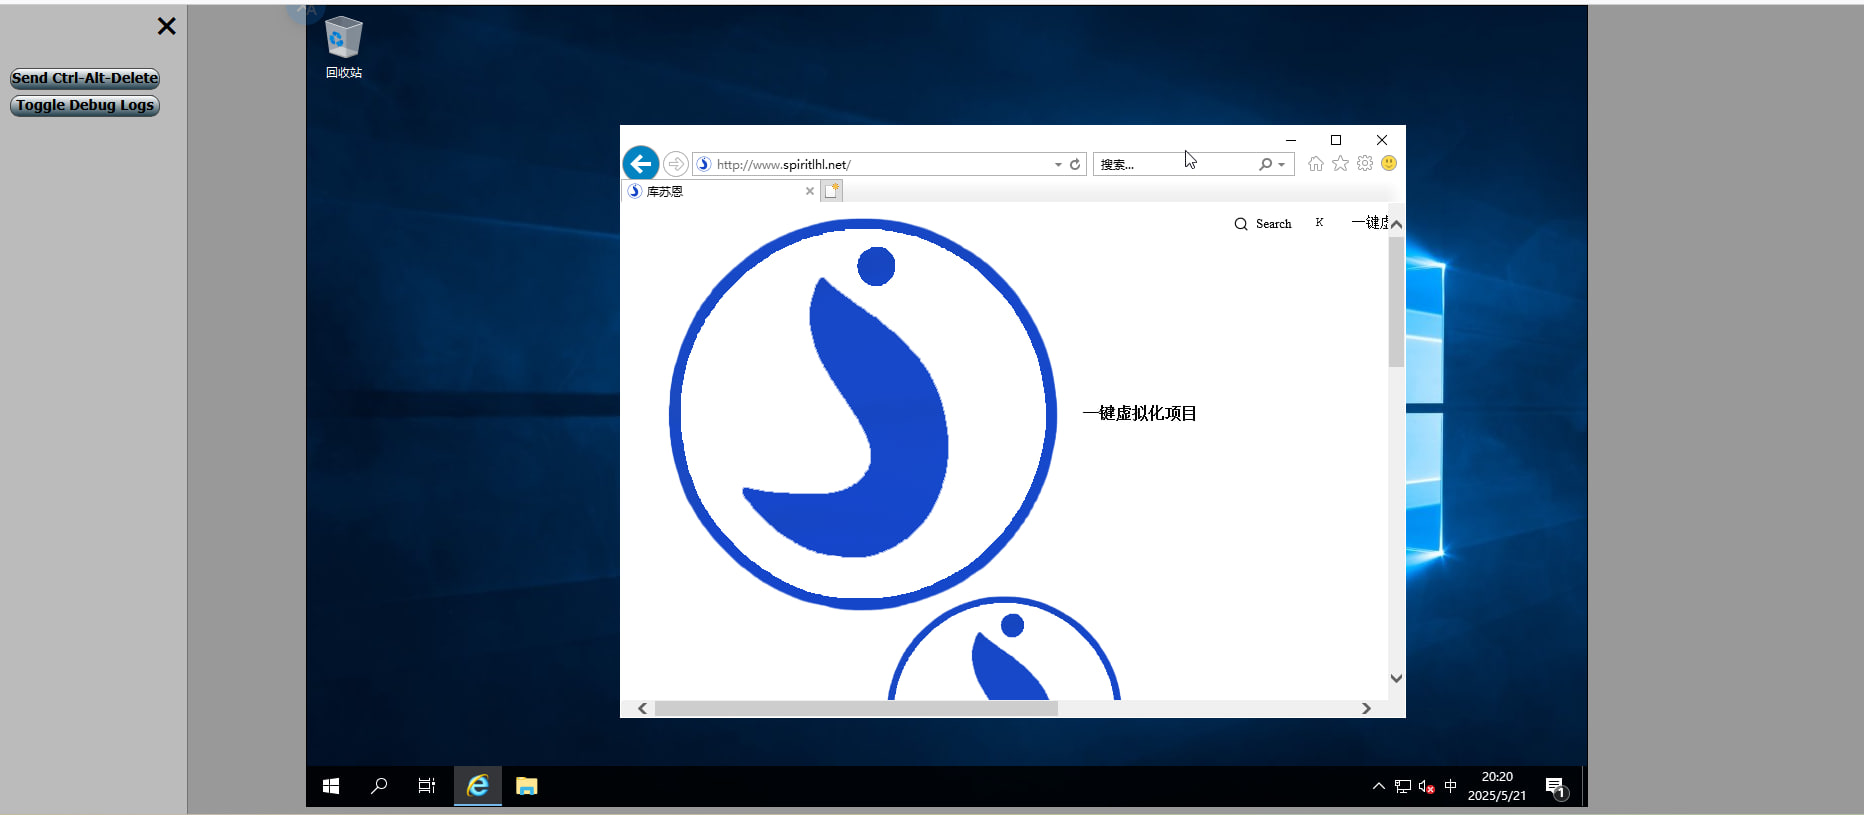
lxc start winvmThe following image can be seen after startup (test visit a website)
No need to configure your own network, lxd will automatically assign IPv4 addresses and connect to the network.
Remove the remote component to restart the browser mapping
If you need to delete the VM and recreate it due to resource limitations or other reasons, use pkill -f websockify to terminate all SPICE signal forwarding, then lxc delete -f winvm to forcibly delete the VM.
lsof -i :6080Check if the PID for the corresponding port still exists to ensure it has completely stopped (if you have signal forwarding for multiple VMs, it's better not to use pkill to delete all of them; use kill -9 to delete the PID for the specific port).
If it crashes and stops within a few minutes of first startup
Need to add CPU passthrough
lxc config set winvm raw.qemu -- "-cpu host"Just start the virtual machine again
The old Windows image only includes Internet Explorer.
Manually enter the following URL in IE: https://www.microsoft.com/zh-cn/edge/download to download the file.
Since IE does not automatically whitelist certificates, multiple pop-ups will appear. Click “Add Domain,” save the changes, and only then will the download button appear on the page.
Additionally, older systems lack the WebView2 component by default. A prompt will appear indicating that this component must be downloaded and installed separately to enable modern browser functionality.
Disadvantages
The frontend lacks authentication, so you can't set user passwords.
If you need frontend authentication, you'll need to use Guacamole with additional settings to implement it, which won't be covered in detail here.
The VM piece doesn't have some well established interactive panels and adaptations, spice is too old (although there is a web-based spice client), and the official panels don't support rbac with a username and password and can only be used with certificates.